Sharing my super simple instructions for how to make an easy DIY no sew window valance!
You won’t believe how easy it is to make your own no sew curtains! This easy DIY curtain is perfect for a bathroom or kitchen window treatment! And even better, this valance cost less than $5!
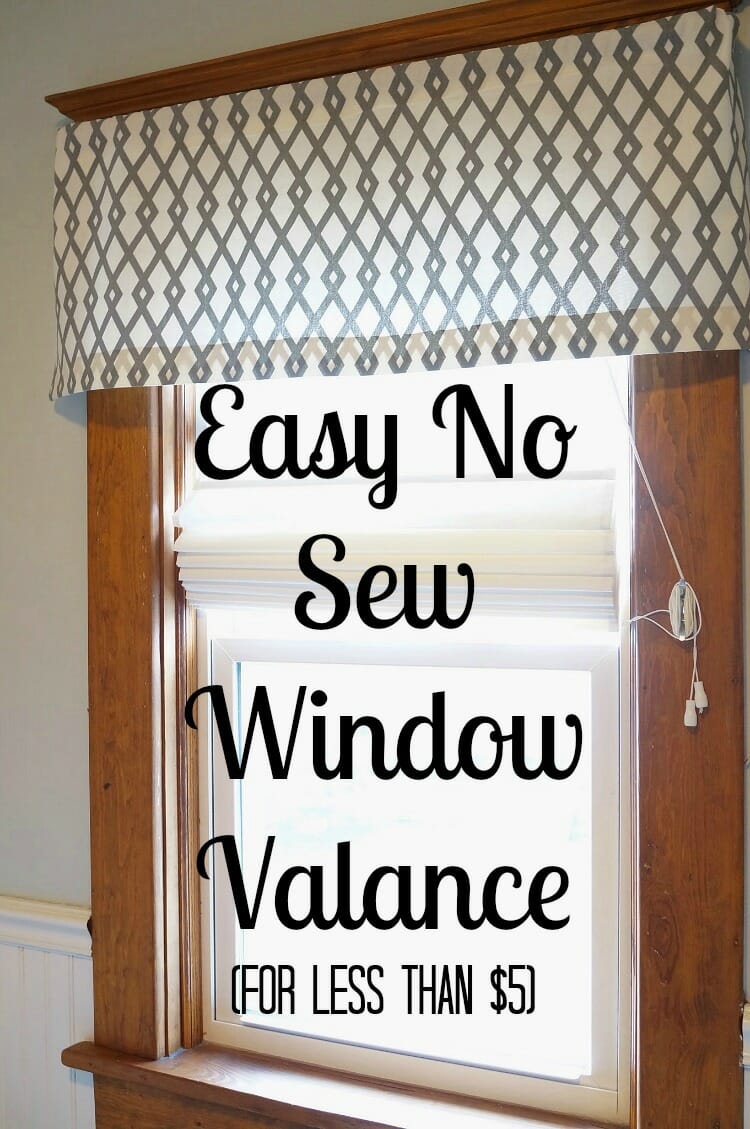
This easy DIY no sew window valance is one of my favorite easy no sew projects. I am a no sew type of gal (see my super popular no sew bench cushion or my window seat with upholstered bench cushion) and love how easy these type of projects can be! I have a sewing machine, but it is just not my forte, but with so many projects, you can get the desired look without any sewing at all!
Not only is this diy window curtain easy, but it is incredibly cheap! it cost me less than $5, so cheap, easy, and diy? Does it get any better than that?
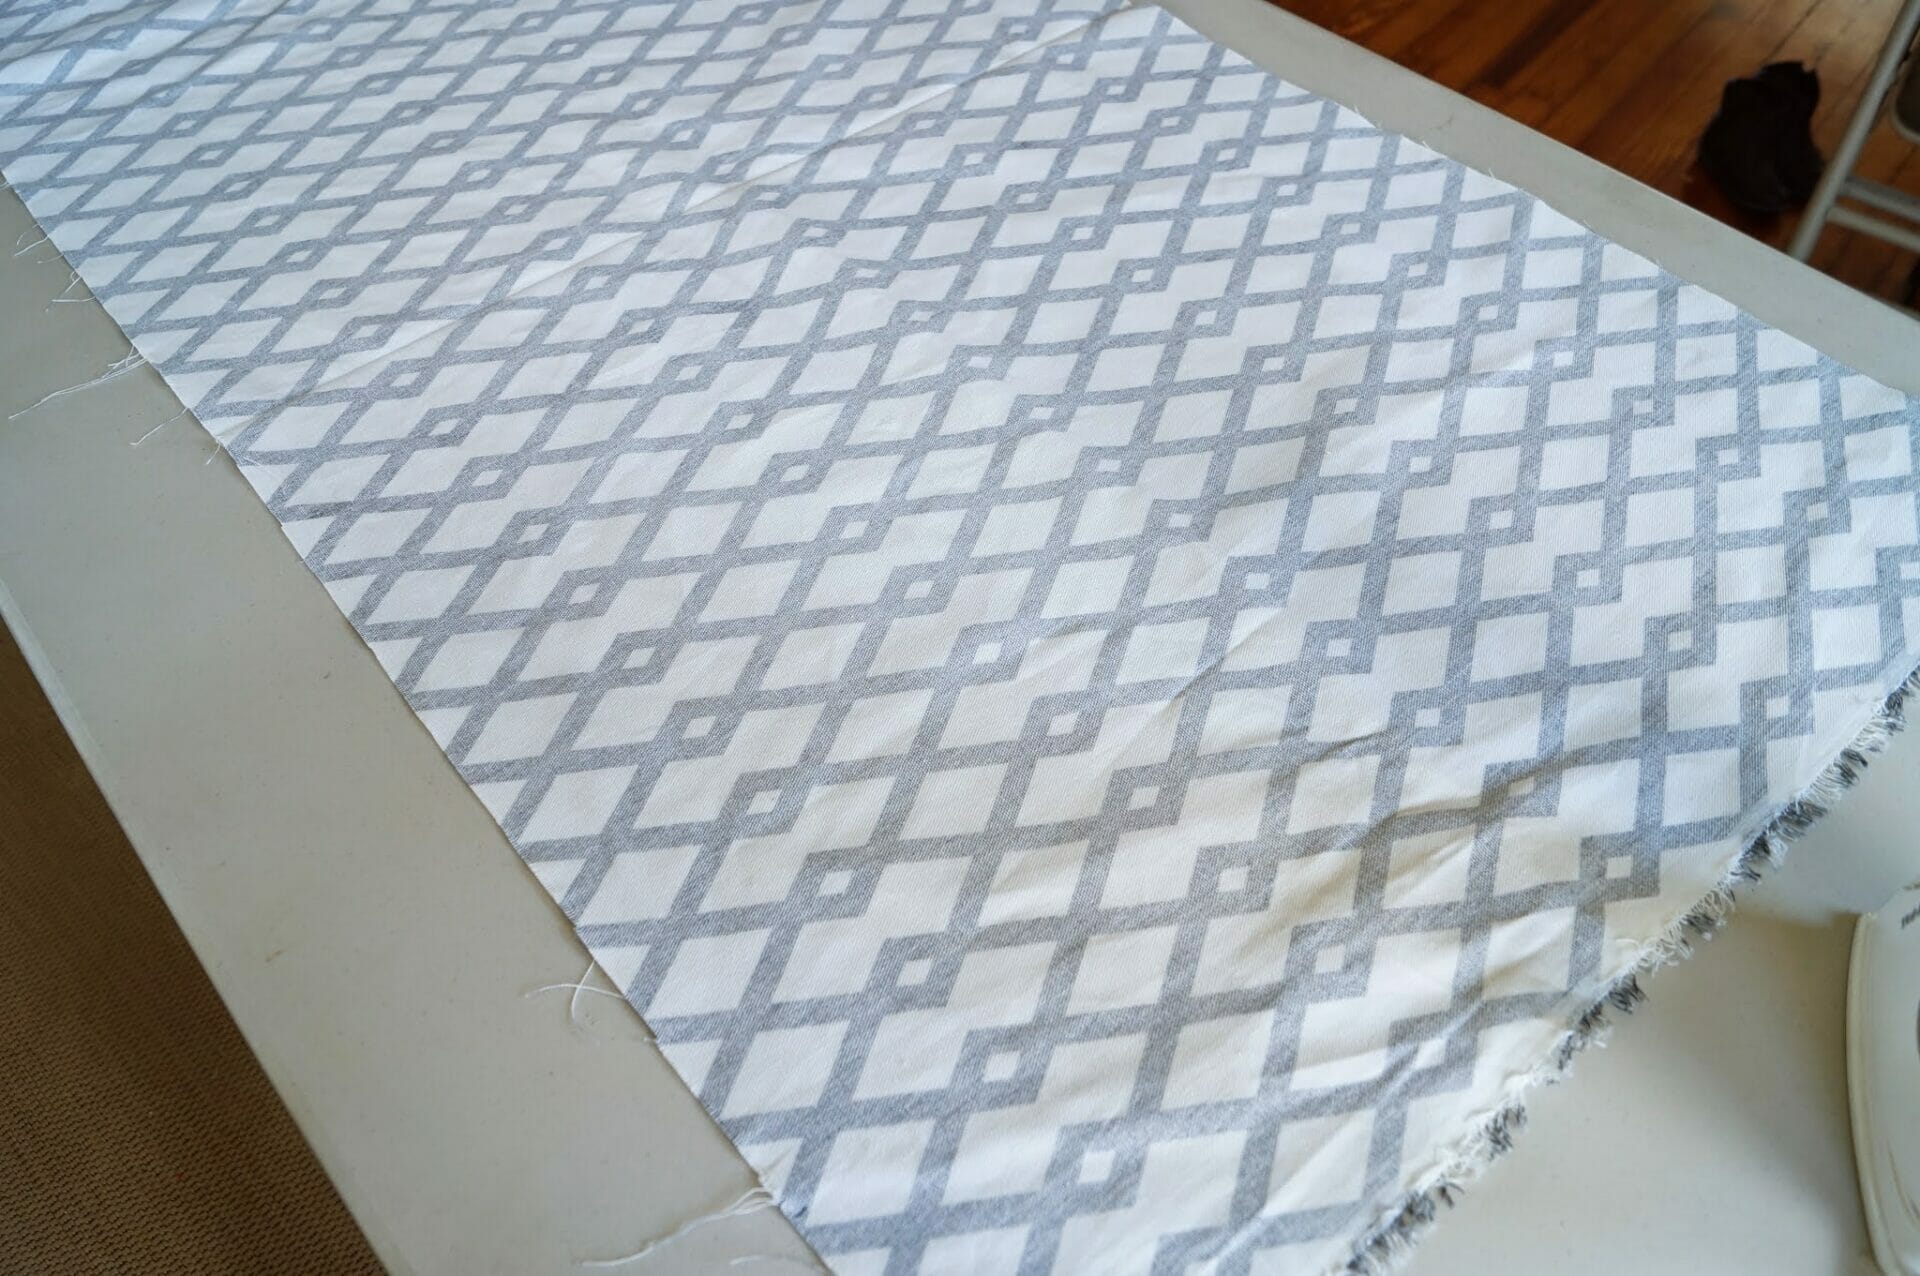
If you are shopping at Joanne’s, ask them where the Waverly fabrics are. At my store, they are in the back. I think these fabrics are much nicer than the ones they have along the big wall of fabric. They are a heavier material and hang much nicer! Make sure to use your 40% off coupon! It is definitely worth spending a couple extra bucks for this fabric. I have no sew curtains in my kitchen and used the regular fabric and this window valance is way nicer.
What do you need to make a no sew curtain?
- Hem Tape, I like stitch witchery
- Fabric, half a yard should be fine, unless you have a massive window
- An iron
- Measuring tape
- Fabric Scissors
- Dish Towel
How to make a no sew window valance
1. Begin by measuring your window and the size that you want your valance to be.
Add 1 inch on each side to allow for the hem. Then cut off any excess you have on your fabric.
2. Lay your fabric out and iron it well.
You don’t want to have to take it back down to smooth it out later!
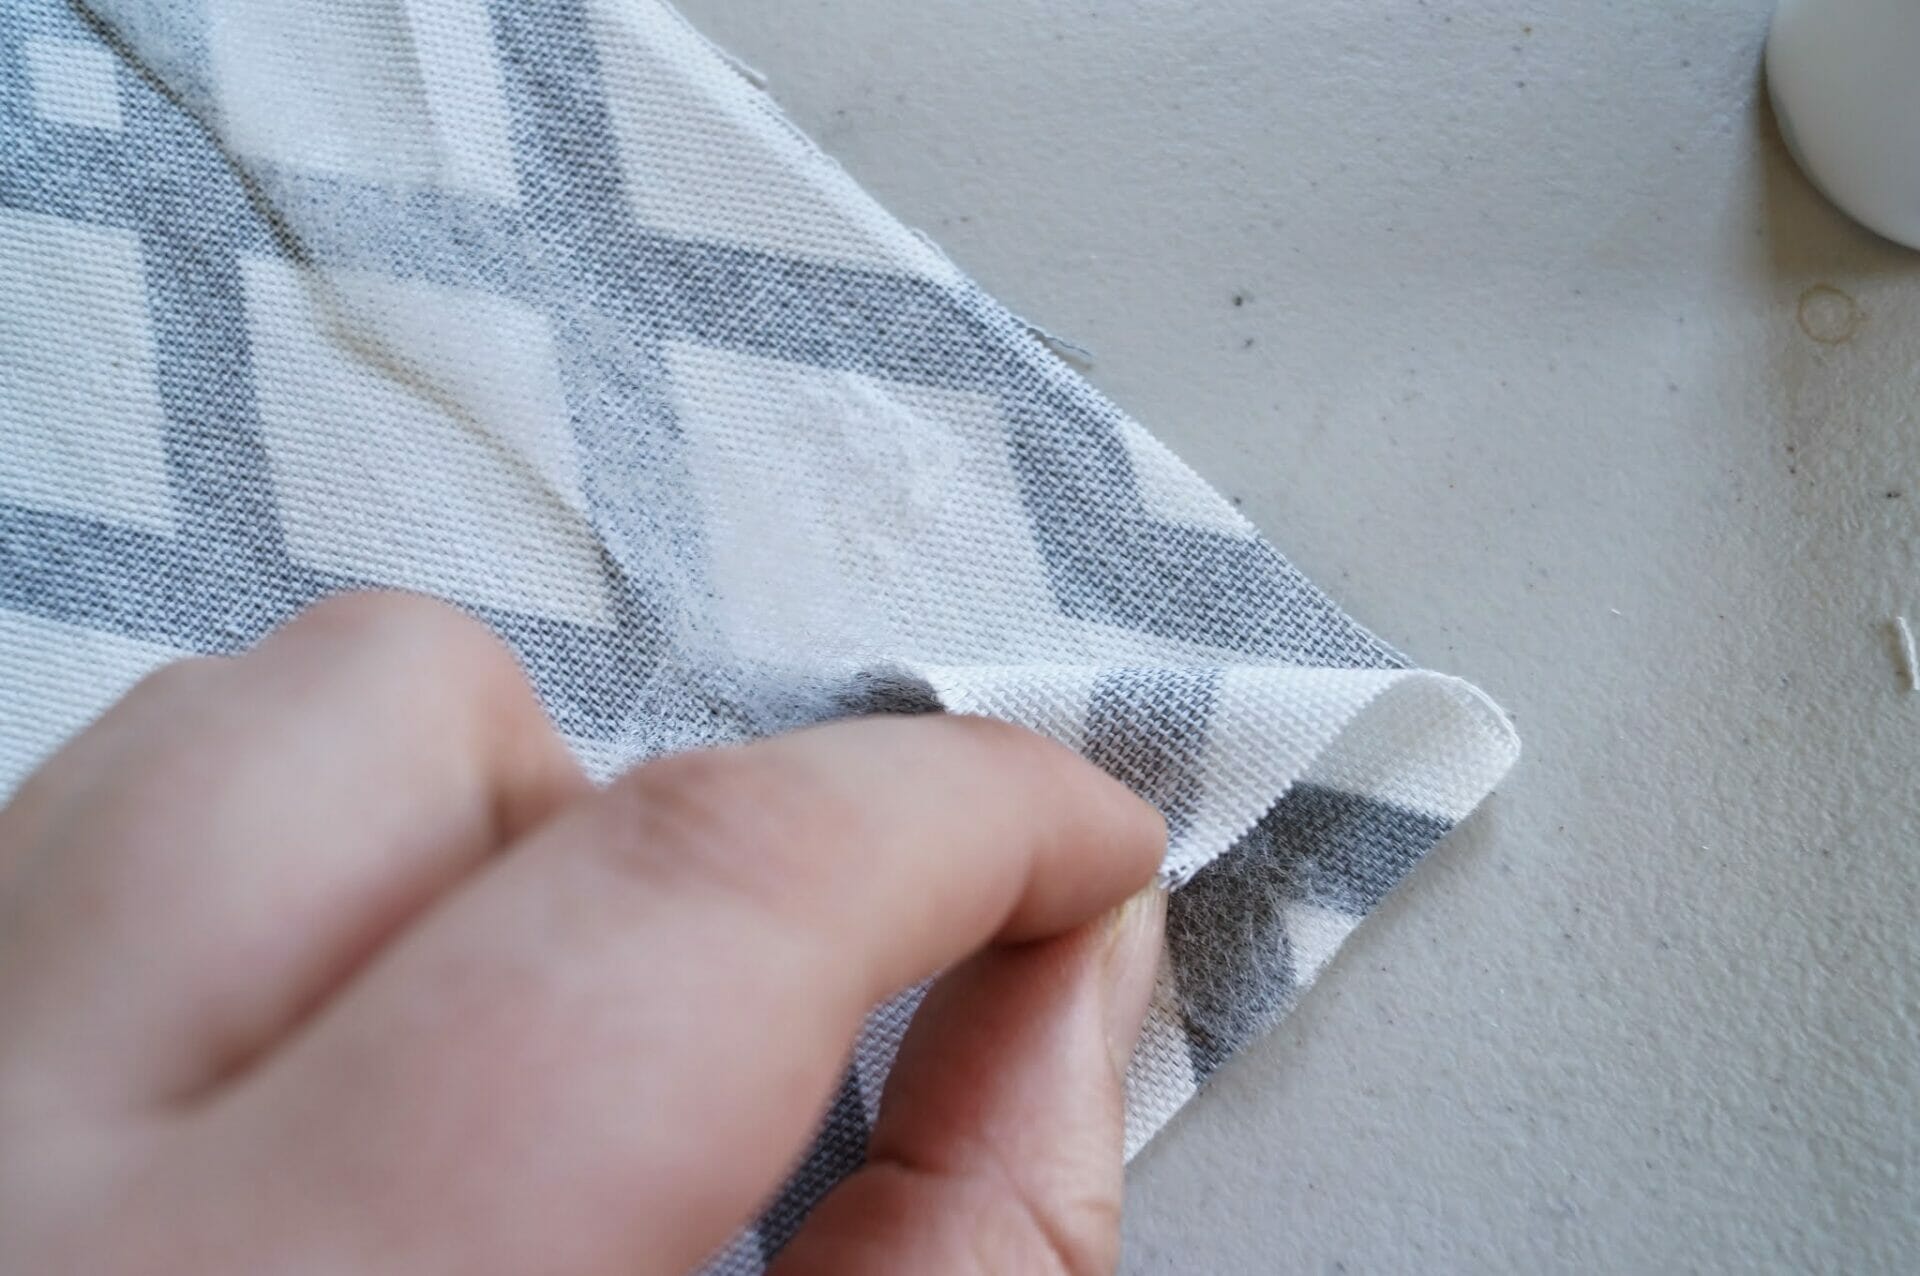
3. Begin by folding down about 1 inch of fabric on all four sides.
Iron those flaps down in order to make a nice crease for hemming later. Double check the size of your curtain rod as well because you need to make sure that your top flap is wide enough to allow for the rod to pass through.
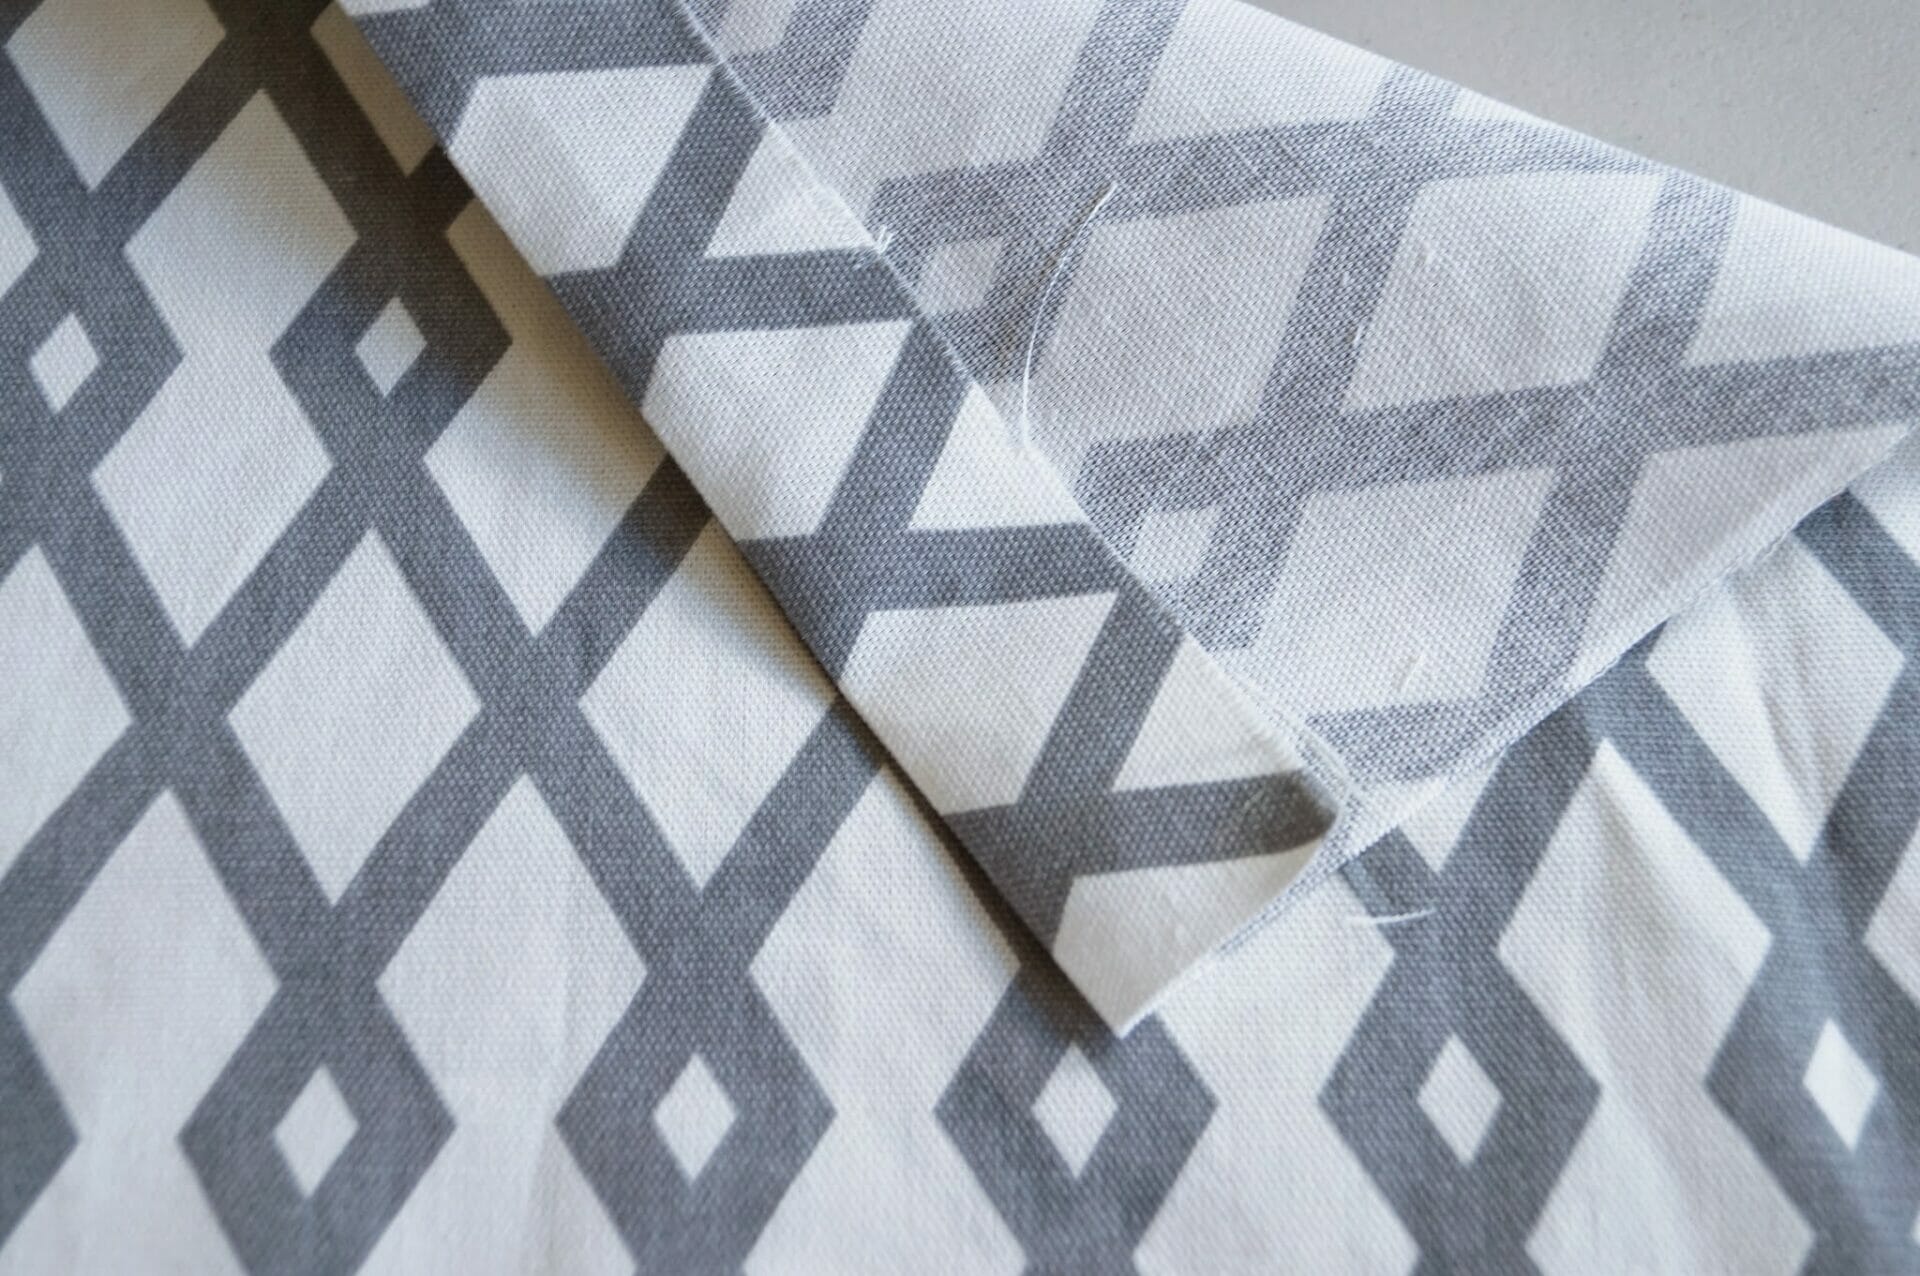
4. Set your iron to whatever temperature the instructions on your hem tape instructs.
Lift your folded hem and put a piece of hem tape cut to size at the bottom of the flap. Make sure that your flap bottom and the hem tape are lined up and no hem tape is sticking out. Don’t forget to double check that your curtain rod can fit through.
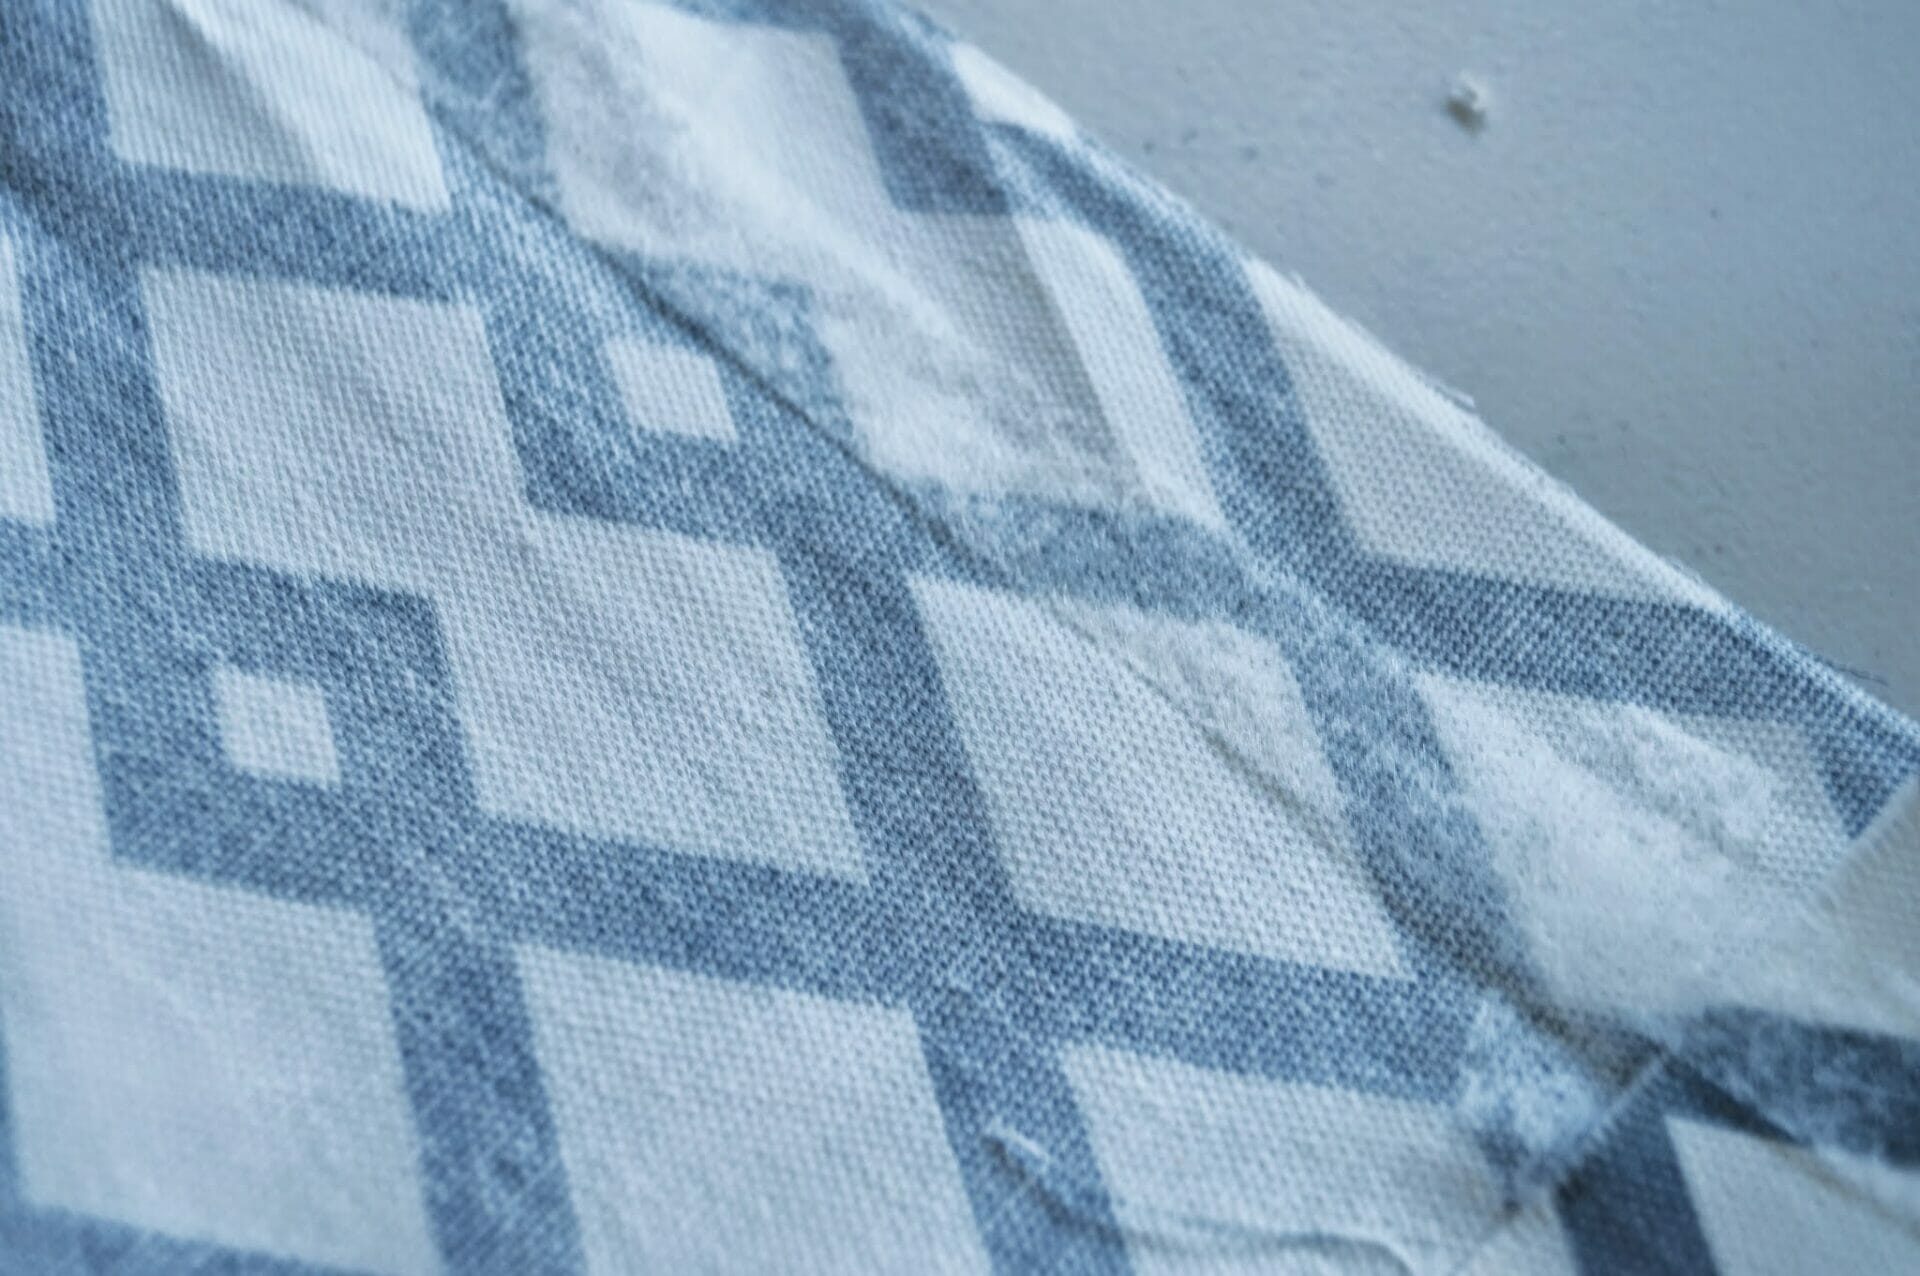
5. Lay a dish towel over the hem and iron each section, holding the iron there for about 10 seconds.
Again, double check what your hem tape’s instructions are.

6. You need to cut a little square out of the two side pieces at the top where they meet the top hem so that you don’t close in your pocket for the rod. Just cut out the fabric that will overlap the top hem.
Then go ahead and iron the side pieces down. After I do the two sides, I always put it on the rod to double check the length before I finish up the bottom. When you have double checked the length, go ahead and finish the bottom.

7. Let everything cool before hanging so that the hems have time to really set up.
When cool, hang and be impressed that you made a curtain!!
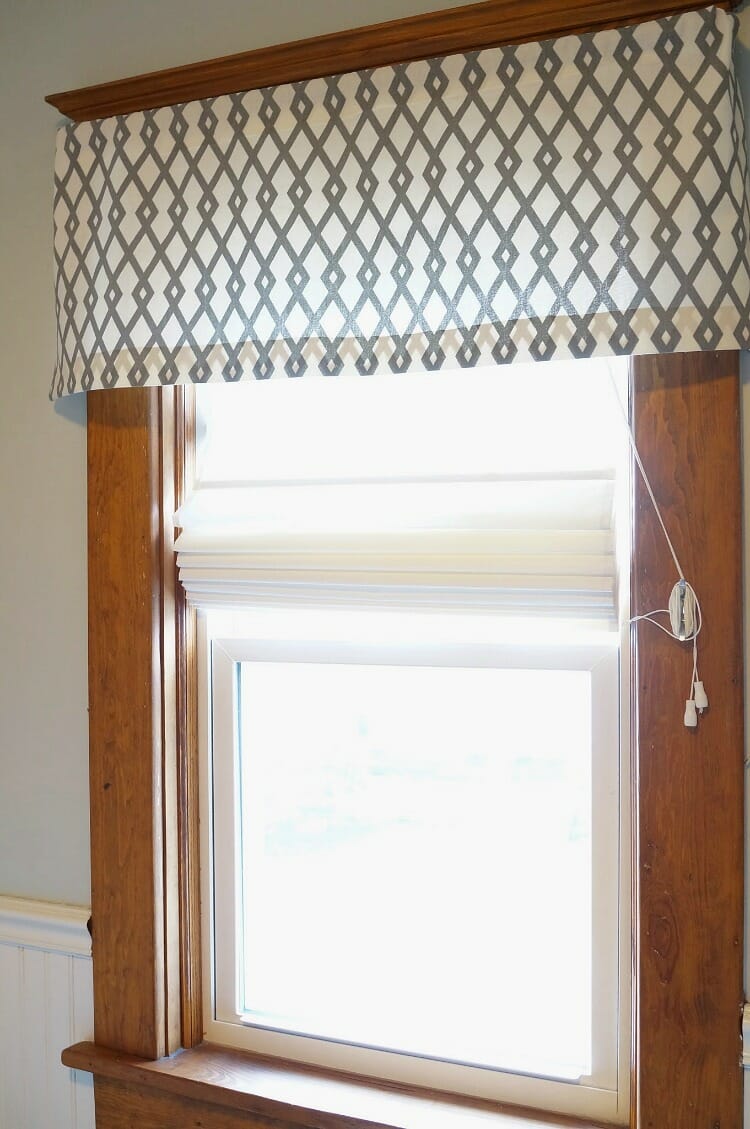
I hope these instructions made sense. It really is super easy to make this Easy DIY No Sew Window Valance! Please ask if you have any questions!
This bathroom is about to embark on a renovation and we are so excited! Check out all the details here!
You had me at no sew! I actually need some new curtains for my sons’ room, so this is perfect 🙂
Lol, I am definitely a no sew girl!! It makes life so much easier!
Super easy! Love it! Thanks for sharing! xox Christine | Amidst the Chais
You did such a great job and it looks so cute
Thank you!
I love it Amanda! It seems so easy but makes such a huge Impact!! I’m currently in the process of coming up for some cute decor ideas for my church’s new banquet hall, and I think DIY valances would be an awesome idea! Sharing ♥
This would be great for your hall because you could make so many for not much money!! Thank you for stopping by and sharing!
Such a great idea. I really like the fabric you used.
Thank you!
What a great no sew project. Love the fabric you used. I need a nice bathroom valance and this is a great idea. Thank you for the awesome tutorial.
Thank you! I love the fabric too!
This turned out great! I love the fabric you used. I am a no sew kind of person, this I can do 🙂
Love that this is a no-sew DIY project, and that fabric you chose is perfect!
Thank you! It was so hard to find a fabric because our floor is so blue!
Simple but elegant.
Thank you!
Can you do a shirred valance this way or only a flat top?
I am not sure since I haven’t tried the shirred, but I would think that if you doubled the length and you scrunched it all up on the rod,it would give the same effect!
How do you know how much fabric to use? Could you show back side with rod inserted? I want to make sure I do it correctly.
You use a few more inches wider than what your window is. I will try to get a picture of the back tonight and add it!
Looking forward to seeing the back with rod inserted. Thanks!
Jess it won’t let me insert pictures in the comment section here. I am going to email you now!
What if print fabric from store is only 54″ wide but window is around 60″wide? How do you attach two pieces of fabric to make it look seamless. Will fabric tape show down the middle when lining up print?
I would do one of two things if your window is wider than your fabric. Either turn the fabric the other way, in which case you can purchase as many yards as you like. Just make sure you still like the pattern when turned! Or you could purchase upholstery fabric, which is usually located at the back of the fabric store, because it is usually much wider. I think you would be able to see the fabric tape if you tried to combine two pieces. You could also make two valances and kind of scrunch them up so that seams aren’t seen. My Mom always bunches up her valances.
Thanks Amanda. I actually found a youtube video showing how to match the pattern using the hem tape. Crossing my fingers that this project turns out well. 🙂 Thanks so much for the blog and answering all my questions.
Oh good! let me know how it turns out!!!
Thanks Amanda! I actually found a youtube video showing how to match the pattern down the middle using the hem tape. Crossing my fingers that this project turns out well. 🙂 Thanks for sharing and answering all my questions.
Great post! Have nice day ! 🙂 ylves
These look very nice. What kind of curtain rod did you use?
Just a cheap one from Walmart! It’s the type that has the curved edges and not the finial at the end!