Old House to New Home

Cook. Create. Renovate. Sharing Easy Recipes and Simple DIYs

  • Home
  • About Me
  • Recipe Index
  • Home, DIY, and Organization
  • Shop
  • Featured At and Link Parties
  • Privacy Policy
  • Work With Me

DIY Reclaimed Wood Bath Art and Towel Rack

August 8, 2014

Today, I am sharing the details of our bathroom remodel. To see the reveal and all the before and afters, go here!
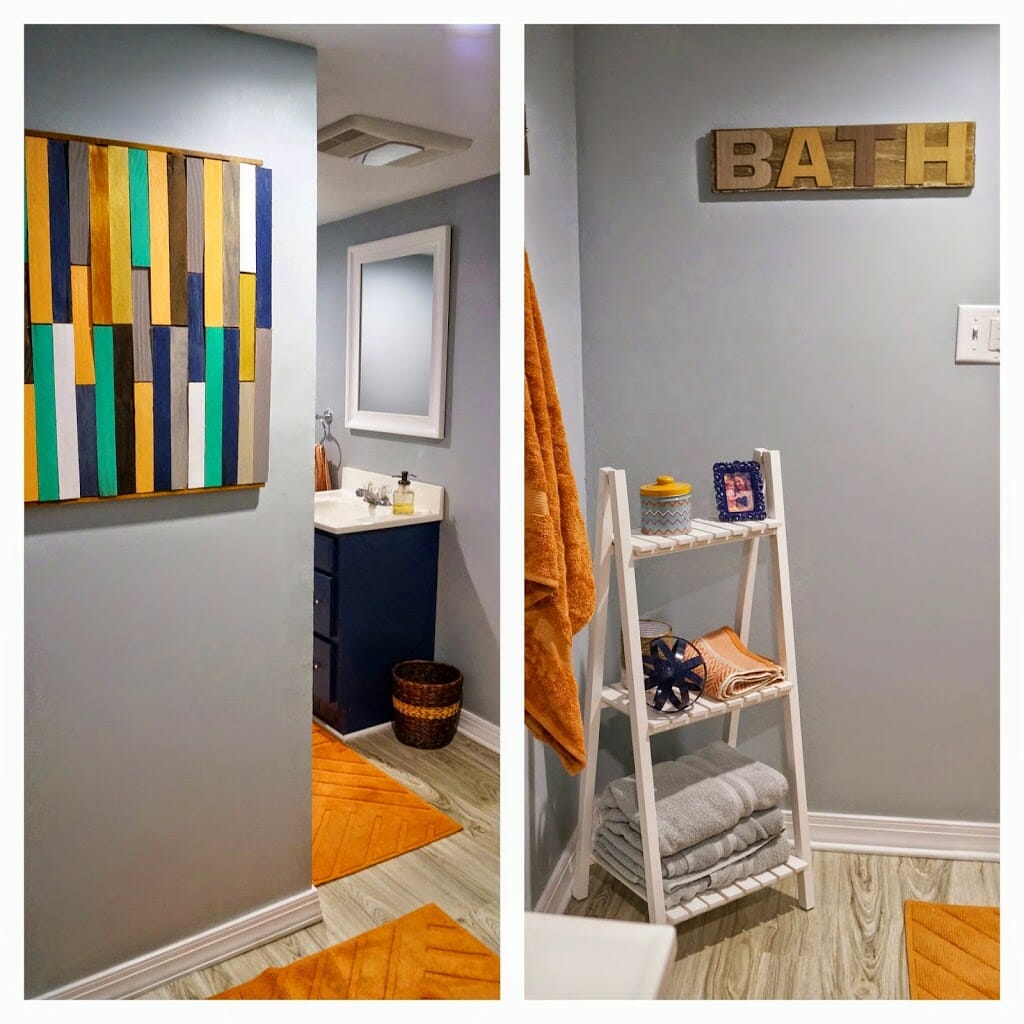
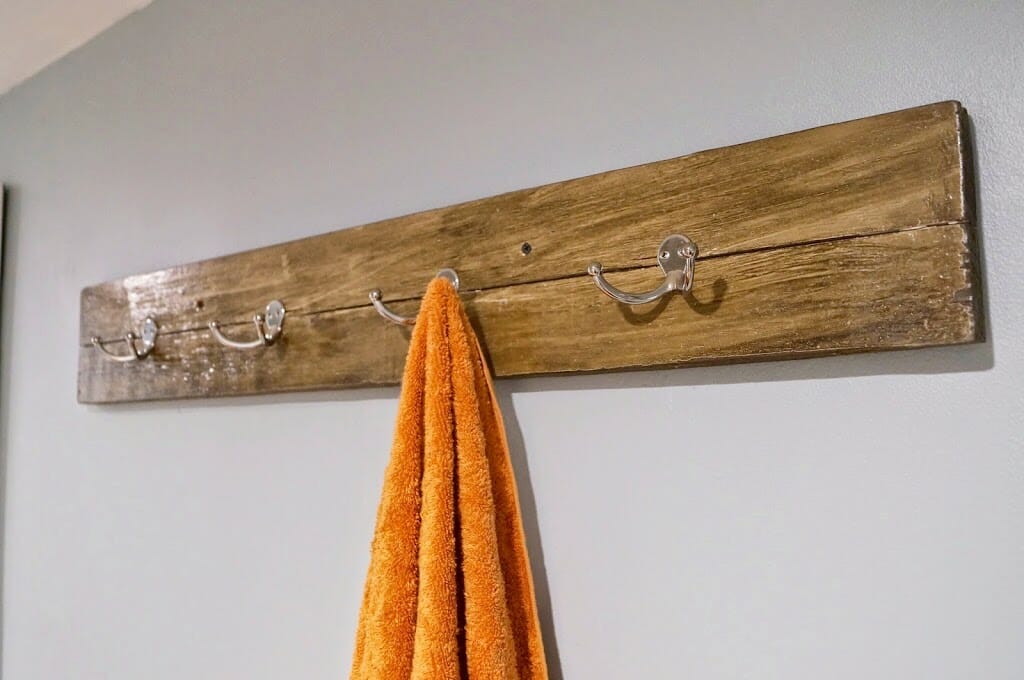
DIY Reclaimed Wood Towel Rack
Reclaimed Wood Towel Rack: DIY
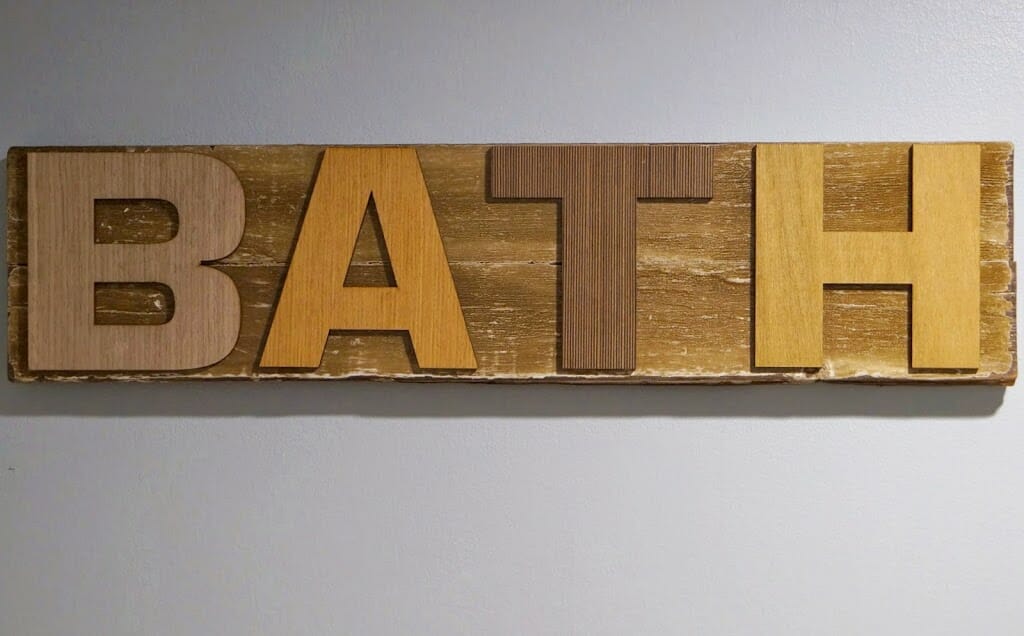
Bath Sign: DIY
DIY Reclaimed Wood Bath Sign
DIY Reclaimed Wood Bath Art and Towel Rack
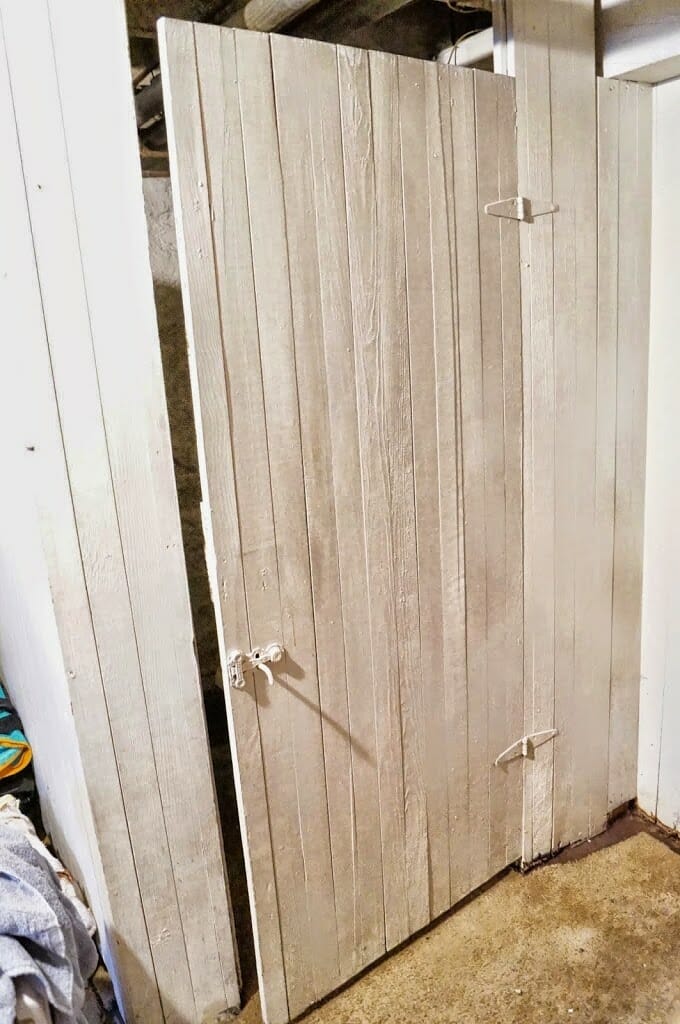
Remember when our toilet was enclosed in this lovely outhouse with wood?
What You Need
A piece of wood cut to size-Use old wood, brand new wood, or to replicate the plank look that I have, use two pieces of tongue and groove boards (the type that slide into each other)
Minwax Dark Walnut Stain
Rusteoleum Weathered Gray Stain
Gloss Poly
Sanding Block

For the Towel Rack
Towel Hooks
Screws to secure into the wall

For the Bath Sign
Wooden Letters
Wood Glue
A nailtooth hanger

I hate throwing good wood out, so I decided to use it as “reclaimed wood” and use it in bathroom. This enclosure was ancient but the wood was still in great shape. I didn’t want to keep it white though and thought a barnwood finish would look better. I cut up the wood into pieces and then sanded it down really well. I then sanded it using an equal part mixture of Minwax Dark Walnut Stain and Rustoleum Weathered Gray. I love this mix of stain, it is a great color. I applied one coat to the wood and then let it dry overnight. Once dry, I sanded the edges again, using a sanding block, to give it a distressed look. I gave the wood one coat of gloss poly to seal it and protect it from scratches and little hands hanging their towels up.
For the towel rack, I purchased 4 hooks from Lowes and then screwed them in, measuring every 8 inches. We screwed the entire piece then into the studs to help secure it to the wall.
For the bath sign, I purchased the wood look letters from Michael’s in their dollar bin section. I didn’t do anything to the letters, they came with that stained, wood look. Using wood glue, I glued the letters on to the stained wood piece. To hang, I nailed in a picture hanger to the back and then hung it on a screw on the wall.
Both pieces were very easy and if you don’t have old wood laying around, brand new wood would look great, too. I would just sand it even more to give it an older, distressed look.

Now here are the details of the bathroom!

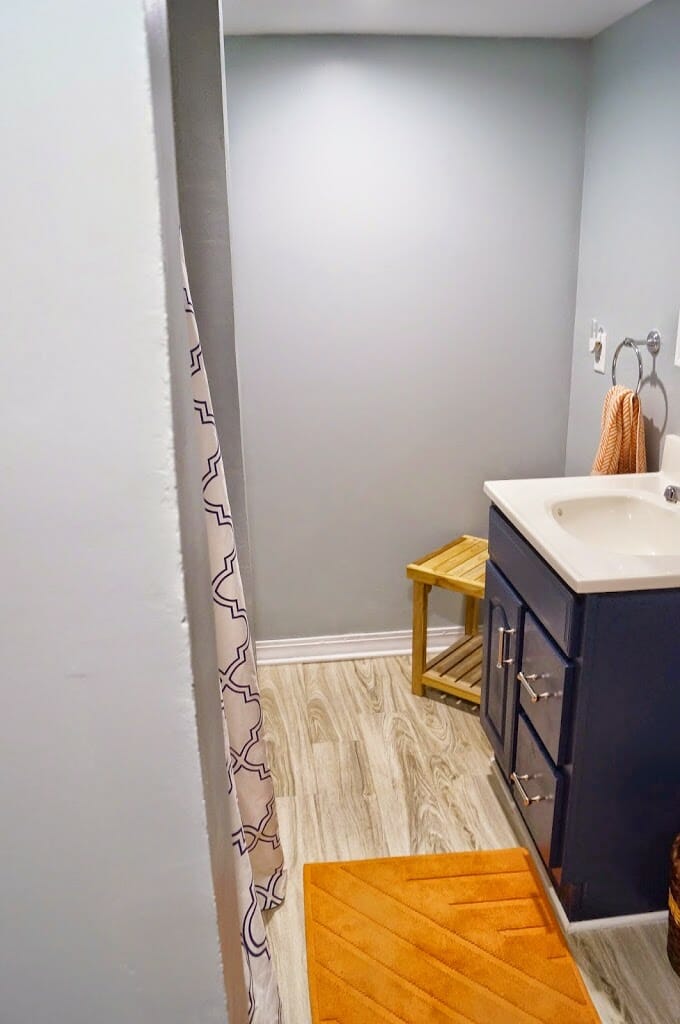
Wall Color: Smoke by Benjamin Moore, Color Matched to Sherwin William’s HGTV Paint in a Satin Finish.
Trim Color: (Off the Shelf) Ultra White Paint by Valspar.
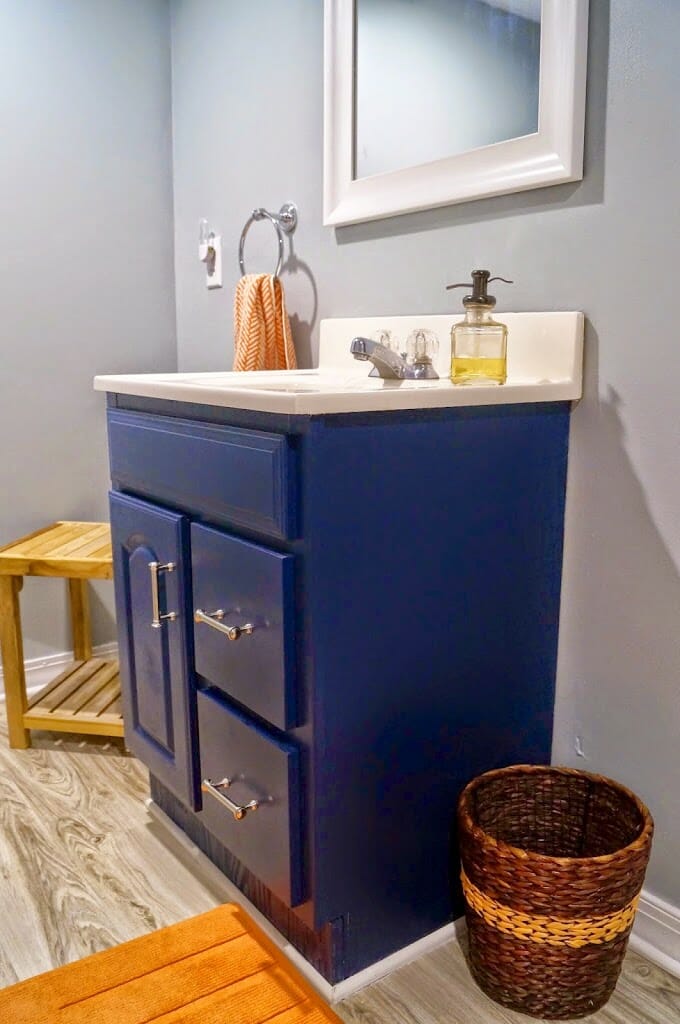
Vanity Color: Indigo Streamer by Valspar in a Semi-Gloss Finish
Vanity Primer: My favorite, BIN 1-2-3 Primer

Painted Vanity Valspar Indigo Streamer

Flooring: Allure Traffic Master Flooring in Alpine Elm.  I loved this flooring! It was easy to install and seems very durable. I even started installing the floor backwards, which made it much more difficult, and it was still easy! It is supposed to withstand a flood and is guaranteed for 25 years. This flooring is great for bathrooms and laundry rooms or anywhere else with a lot of water.

Allure Trafficmaster Alpine Elm

In trying to stick to our budget, I shopped around in order to find good deals on the accessories for our bathroom and anything I couldn’t find, I DIYed.

Rugs and Towels: Nate Berkus for Target
Towel Ring, Toilet Paper Ring, Mirror, Soap Dispenser: Threshold from Target
Shower Curtain and Rings: HomeGoods
Stool and Shelf Ladder: HomeGoods
Trash Can: Purchased Threshold Wicker Trash Can from Target and painted it with Orange Acrylic Paint
Color Block Wood Shim Art: DIY (Tutorial coming soon!)

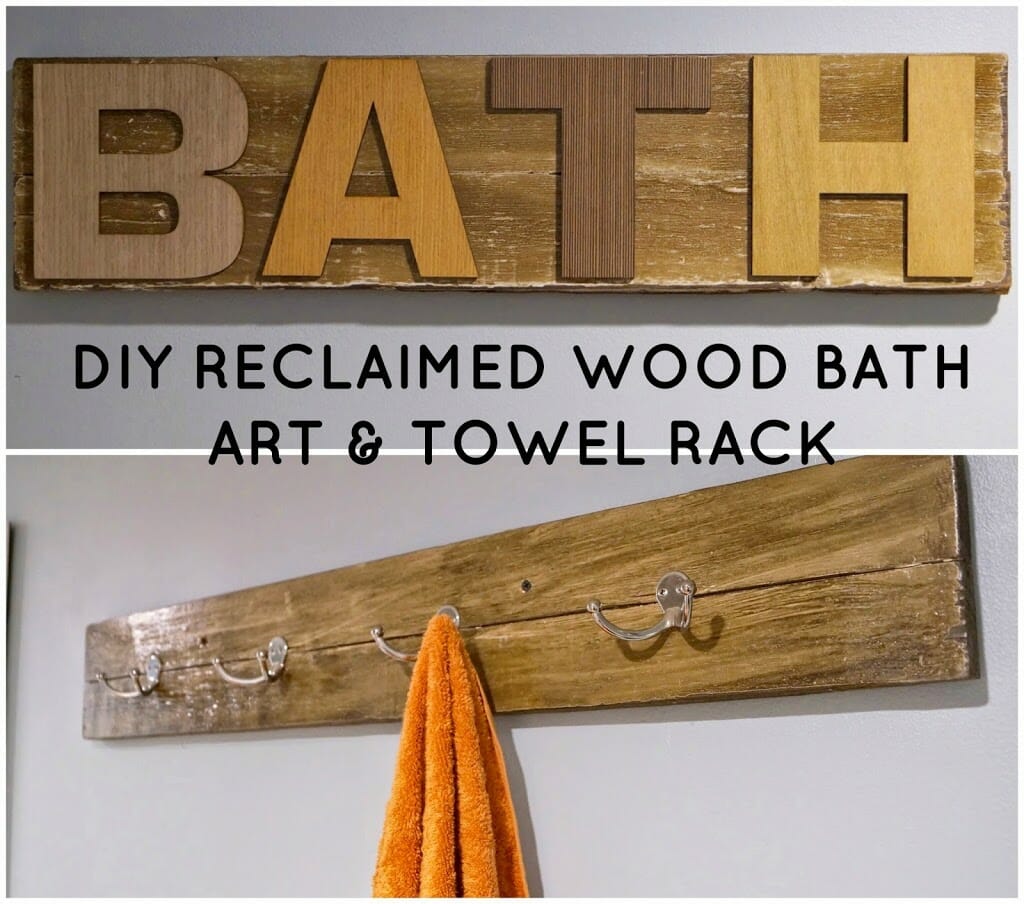
I have one more post coming on our bathroom, a full tutorial on the DIY Wood Shim Wall Art!

You May Also Like...

  • Main Bathroom Remodel Plans and InspirationMain Bathroom Remodel Plans and Inspiration
  • DIY Wood Clip BoardsDIY Wood Clip Boards
  • Our Traditional Main Bathroom Remodel and the Jeffrey Court Renovation Challenge!Our Traditional Main Bathroom Remodel and the Jeffrey Court Renovation Challenge!
  • DIY Chunky Wood Floating ShelvesDIY Chunky Wood Floating Shelves
  • The Easiest DIY Wall ArtThe Easiest DIY Wall Art
  • How to Paint Wall StripesHow to Paint Wall Stripes

Posted by Amanda @ Old House to New Home 13 Comments
Filed Under: Decor, DIY Tagged: bathroom, DIY, rustic, towel rack, wood

Comments

  1. Angel Casale says

    August 14, 2014 at 5:56 pm

    How easy and inexpensive, now that’s my kind of project 🙂 Thanks for sharing! I will have to check out Michael’s.

    Reply
    • Amanda @ Old House to New Home says

      August 18, 2014 at 10:44 pm

      I hope you are able to find the letters! I think they are so pretty with their rustic stained looked!

      Reply
  2. Agy Lee says

    August 16, 2014 at 7:34 am

    Very nice! Does the gloss poly prevent the wood from going mouldy? We live in a very humid place so if it does then that would be great!

    Reply
    • Amanda @ Old House to New Home says

      August 18, 2014 at 10:45 pm

      The glossy poly should seal in the wood and keep the moisture out!

      Reply

Trackbacks

  1. Bathroom Decorating Ideas on a Budget DIYReady.com | Easy DIY Crafts, Fun Projects, & DIY Craft Ideas For Kids & Adults says:
    July 2, 2015 at 3:44 am

    […] via Old House to New Home […]

    Reply
  2. 15 DIY Home Improvement Projects Using Wood says:
    December 14, 2015 at 12:24 pm

    […] Towel Rack – Don’t leave the towels on the floor! This simple project will ensure you have all the hooks you need to keep your towels out of a heap on the floor. […]

    Reply
  3. Pillow Case Blog says:
    June 8, 2016 at 2:54 am

    100 Reclaimed Wood Sign That Says

    […] og! I am so happy to have you here! I hope you stick around and check out my rec […]

    Reply
  4. DIY Bathroom Decorating Ideas – Shamco Property Management says:
    June 8, 2016 at 4:43 pm

    […] via Old House to New Home […]

    Reply
  5. Bathroom Decorating Ideas on a Budget DIY Ready says:
    July 5, 2016 at 1:44 pm

    […] via Old House to New Home […]

    Reply
  6. 22 Awesome Bathroom Decorating Ideas On A Budget – DIY AND SHARE says:
    August 29, 2018 at 11:53 am

    […] DIY Reclaimed Wood Bath Art And Towel Rack Photo by Old House To New Home […]

    Reply
  7. Bathroom Decorating Ideas On A Budget Lauren J – Hot Pomelo – Internet Portal.. says:
    August 29, 2018 at 12:08 pm

    […] DIY Reclaimed Wood Bath Art And Towel Rack Photo by Old House To New Home […]

    Reply
  8. 15 Great Bathroom Towel Storage Ideas For Your Next Weekend Project – Shawnee KS Homes and Lifestyle says:
    September 18, 2019 at 7:30 am

    […] leave it unfinished. Consider using reclaimed wood. It gives the rack a lot of character. Check out oldhousetonewhome for more […]

    Reply
  9. 15 großartige Ideen zur Aufbewahrung von Badetüchern für Ihr nächstes Wochenendprojekt - Sınırsız Bilim says:
    August 4, 2020 at 11:18 am

    […] möchten. Erwägen Sie die Verwendung von Altholz. Es gibt dem Rack viel Charakter. Auschecken oldhousetonewhome für mehr […]

    Reply

Leave a Reply Cancel reply

Your email address will not be published. Required fields are marked *

Recipe Rating


This site uses Akismet to reduce spam. Learn how your comment data is processed.

Welcome!

Welcome to my blog! I am so happy to have you here! I hope you stick around and check out my recipes or see how I am turning our old house into our brand new home!

Be Social! Follow Me Here!

Search This Blog:

Search by Category

Subscribe to My Email List to Get New Posts!

Popular Posts

  • Mini Macaroni and Cheese Bites
  • Ten 21 Day Fix Recipes that are easy, healthy, delicious, and family friendly! Easy 21 Day Fix Recipes
  • Woodland Theme Baby Shower for a boy Woodland Themed Baby Shower
  • Rigatoni and Chicken in Tomato Cream Sauce Instant Pot Recipe Instant Pot Creamy Chicken Rigatoni
  • DIY Radiator Cover DIY Radiator Cover Shelf

Come Pin With Me!

SoFab Badge

Theme by 17th Avenue · Powered by WordPress & Genesis