So it has been a long road for this bathroom remodel and definitely has taken us longer than I expected, but we are done!! We faced a lot of challenges…old wooden walls, crooked floors, crooked walls, but all in all, I think it looks fantastic! I am so proud that we did so much of the work ourselves. With the help of my Dad, we were able to do everything but the plumbing and the electrical.
We DIYed so much because not only would it give us the opportunity to learn a lot, but also to save money, like you can with a good national bank, for example. I absolutely hate paying someone to do something that we could learn to do. We ended up basically gutting the bathroom and were still able to stay around our budget.
I think breaking this down will be the easiest way to tell you exactly what we did.
Plumbing:
Jackhammered up floor to install new plumbing to add a sink and toilet
Moved shower 12 inches and installed new shower
Installed toilet
Installed vanity
Structural:
Removed two old wooden walls
Studded, dry walled and mudded new walls and the shower surround
Patched tons of damage caused by moving the shower-holes in ceiling and walls
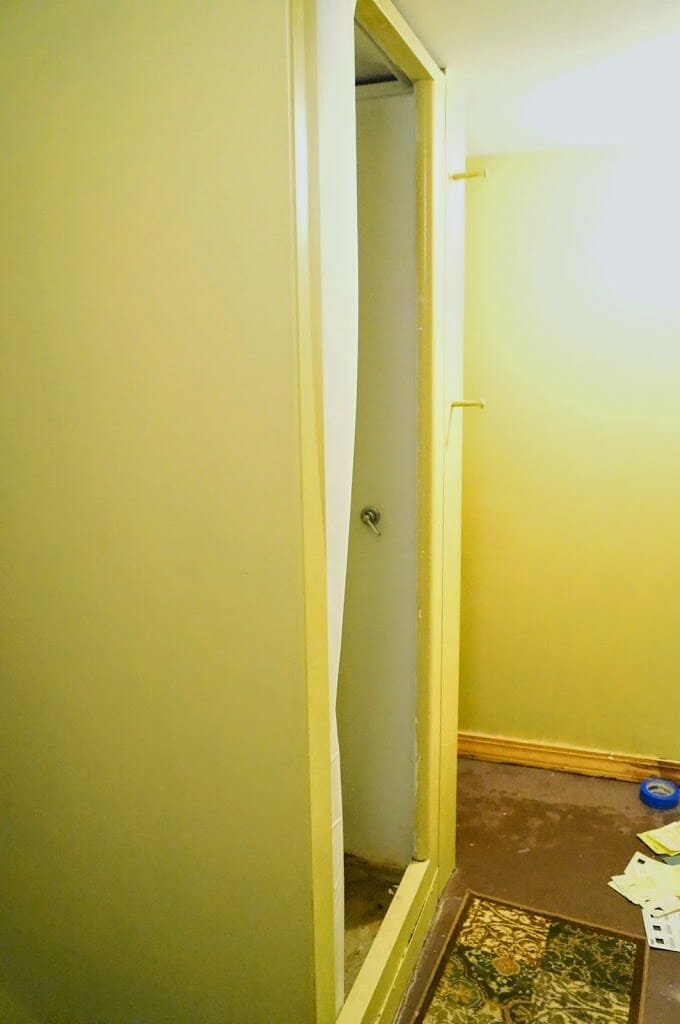
Drywalled over old door
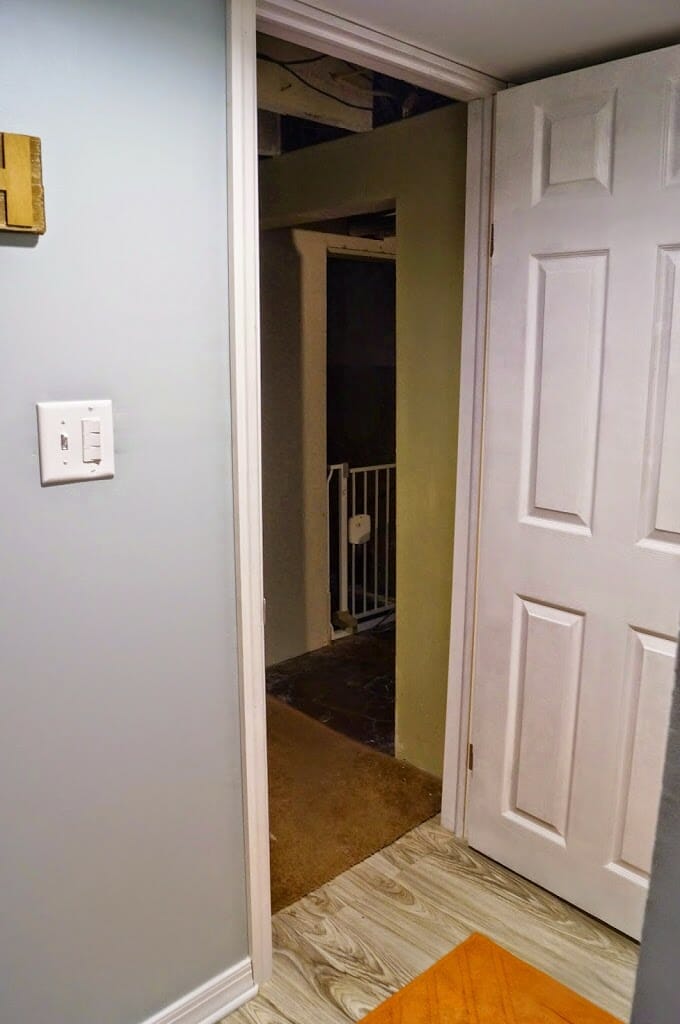
Created a new entrance from the playroom
Electrical:
Removed old outlet
Added new outlet to control new fixtures
Added new fan that has a light, heat, and ventilation
Added two recessed lights
Misc.:
Laid new flooring
Painted walls and ceiling with a waterproof sealer and then painted
Added trim and shoe molding around the floor
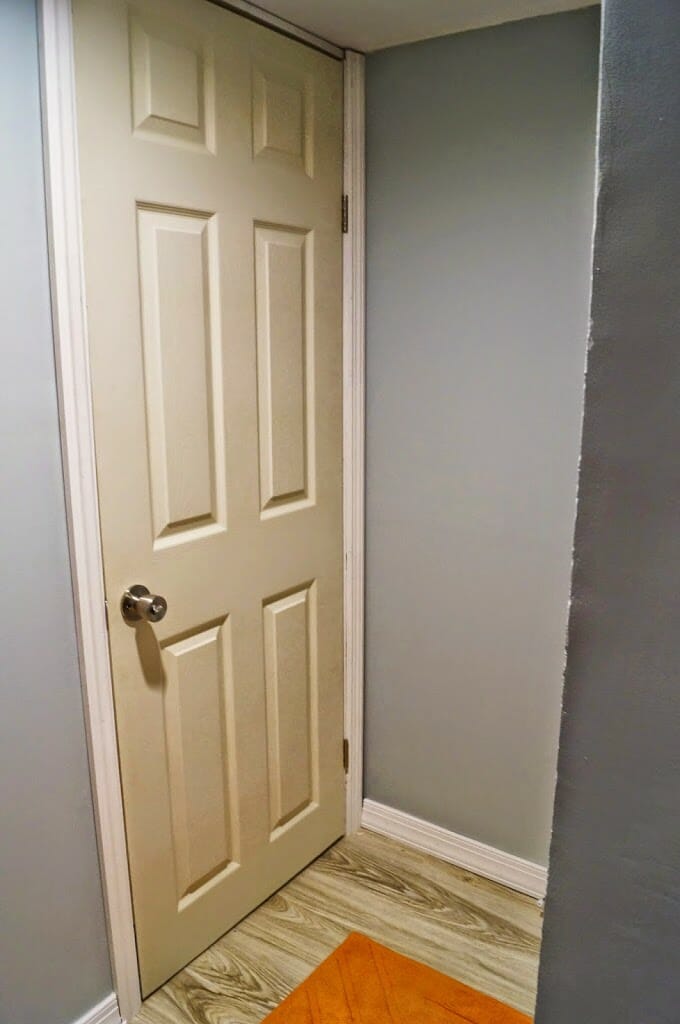
Installed a new door
Overall, the hardest part was mudding the walls. Who knew that it would be so difficult! We spent DAYS trying to get this absolutely perfect, and that perfection never happened.
So here are the before and afters
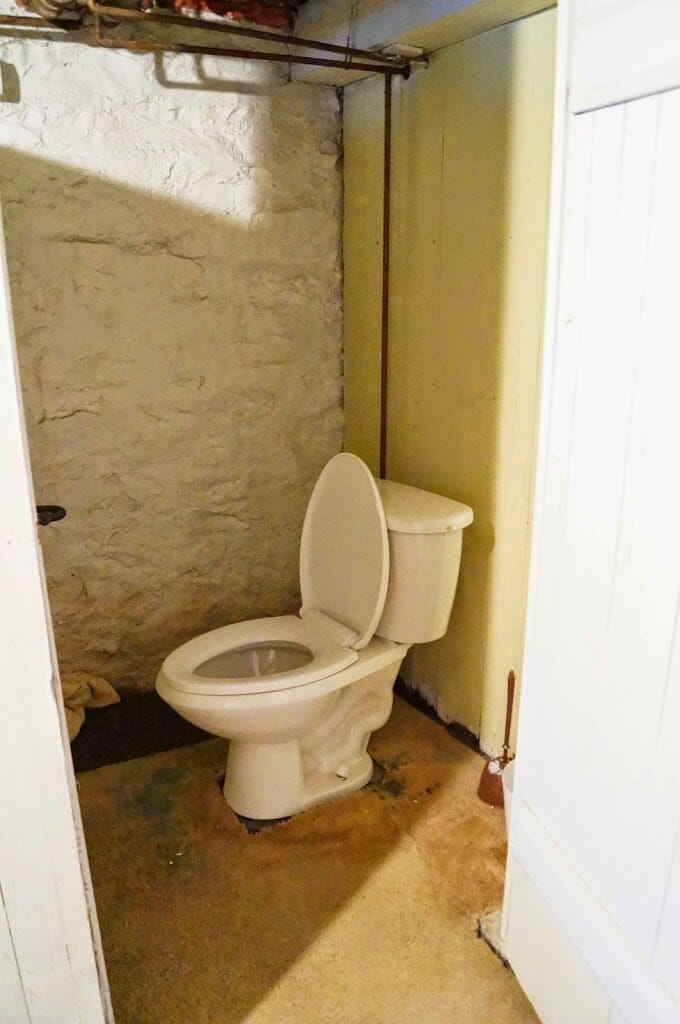
The toilet used to be in the laundry room
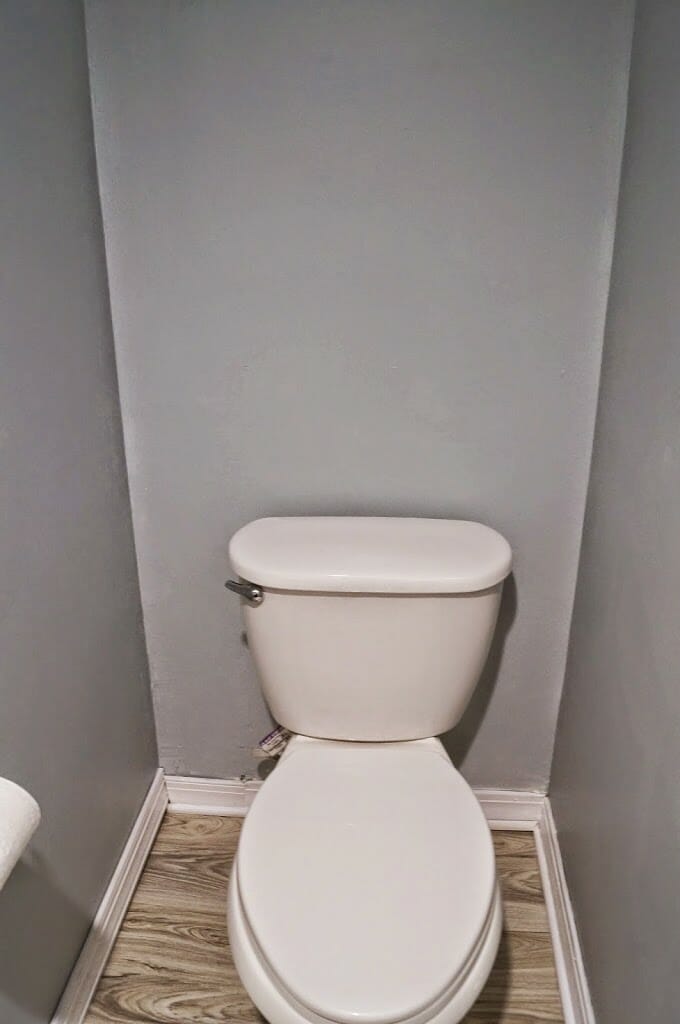
We thought this awkward nook would be perfect for the toilet
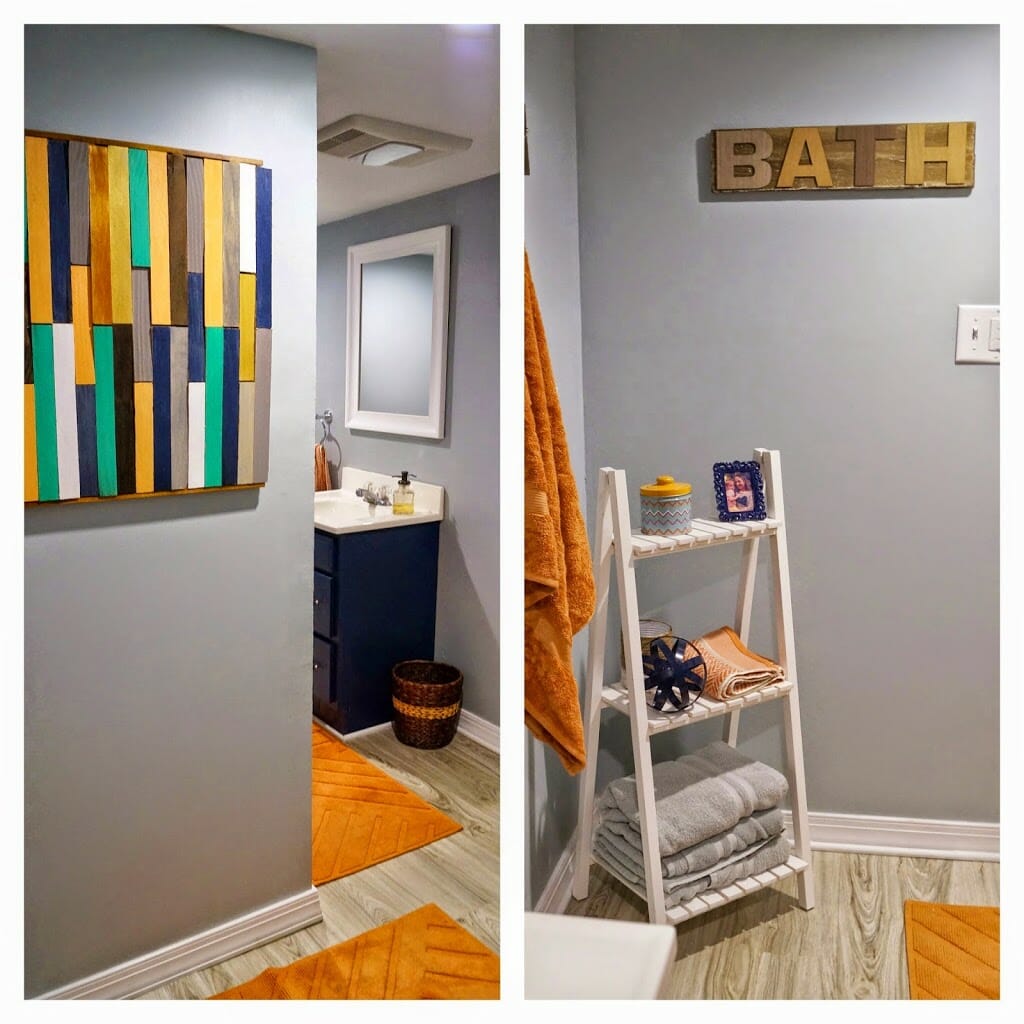
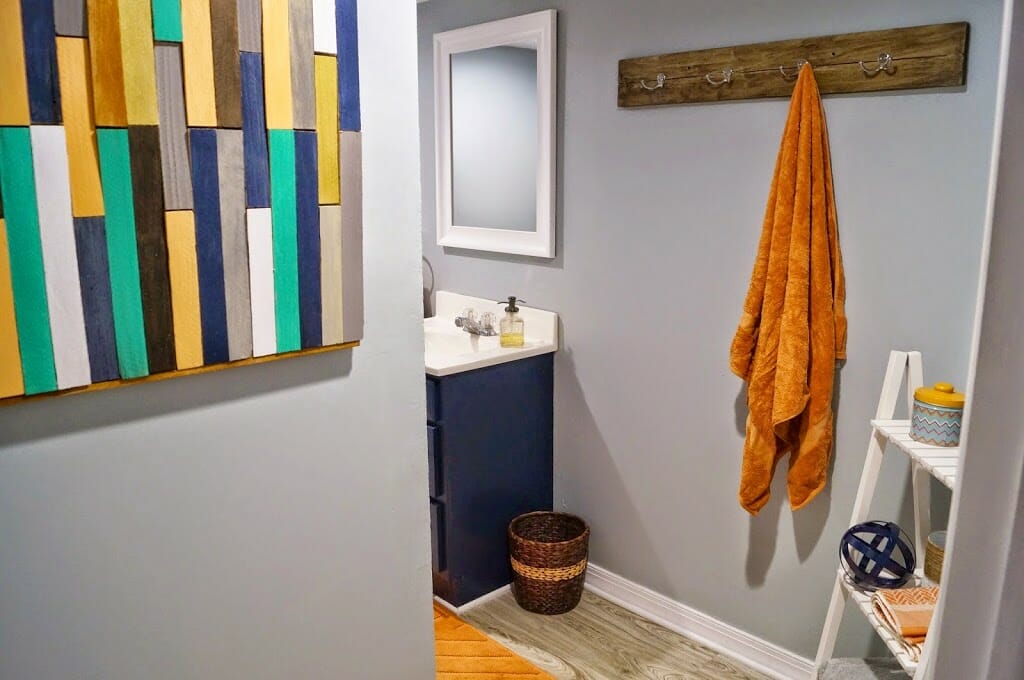
Here’s what it looks like now!
This is the only spot unfinished in the bathroom. I want to build shelves on this wall like I did in my bedroom.
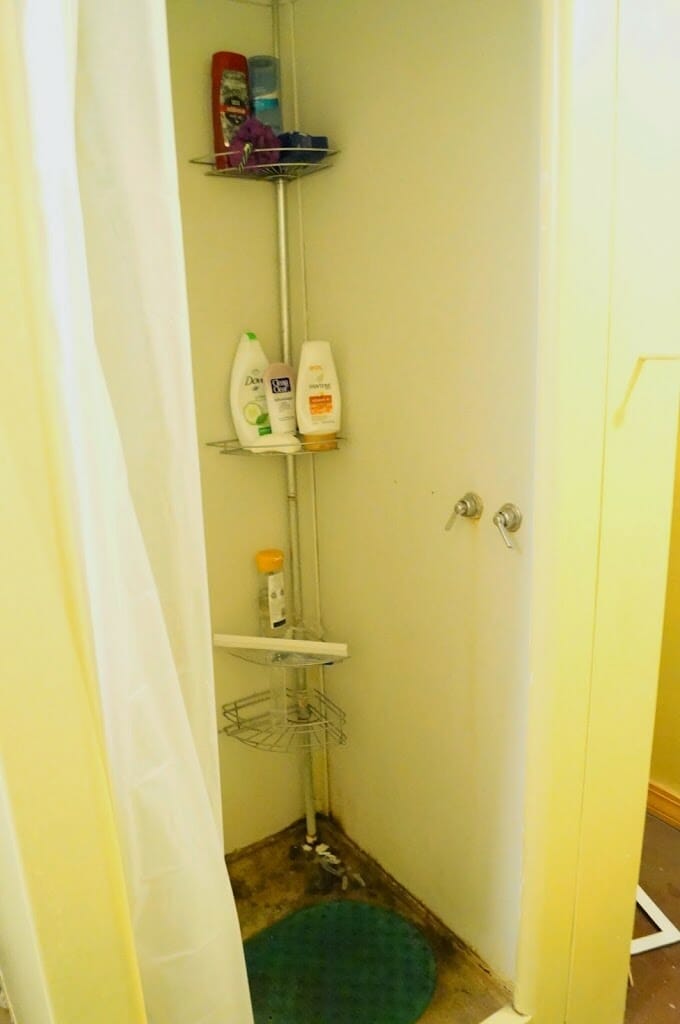
The shower was seriously bad. It was made of cement and weird plasticy walls and had seen better days.
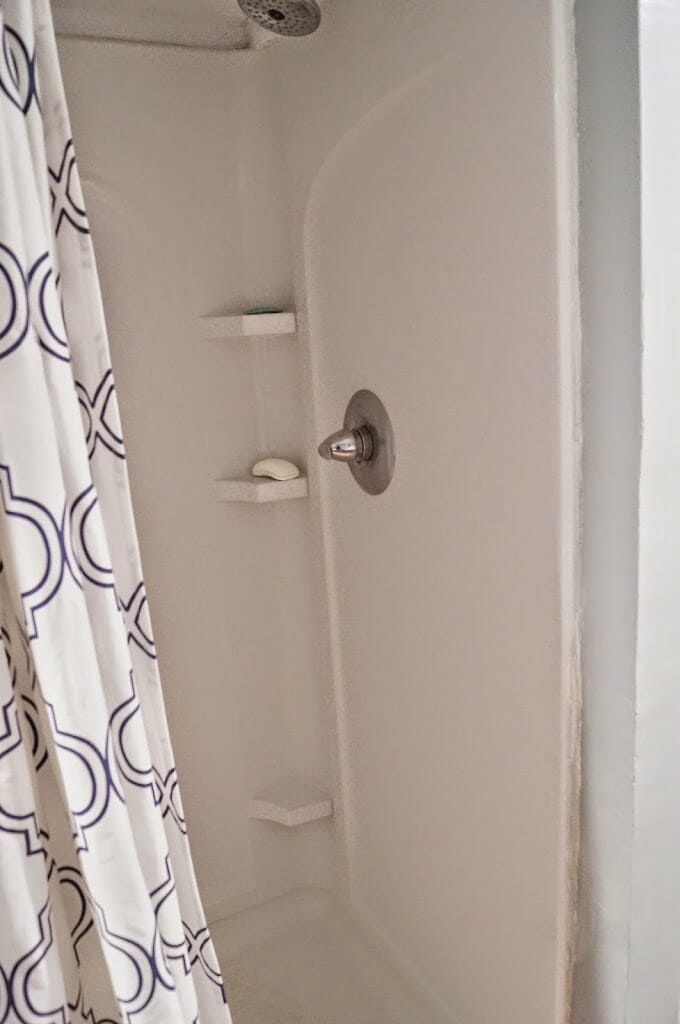
And now I love it! Big, spacious, bright white, and clean!
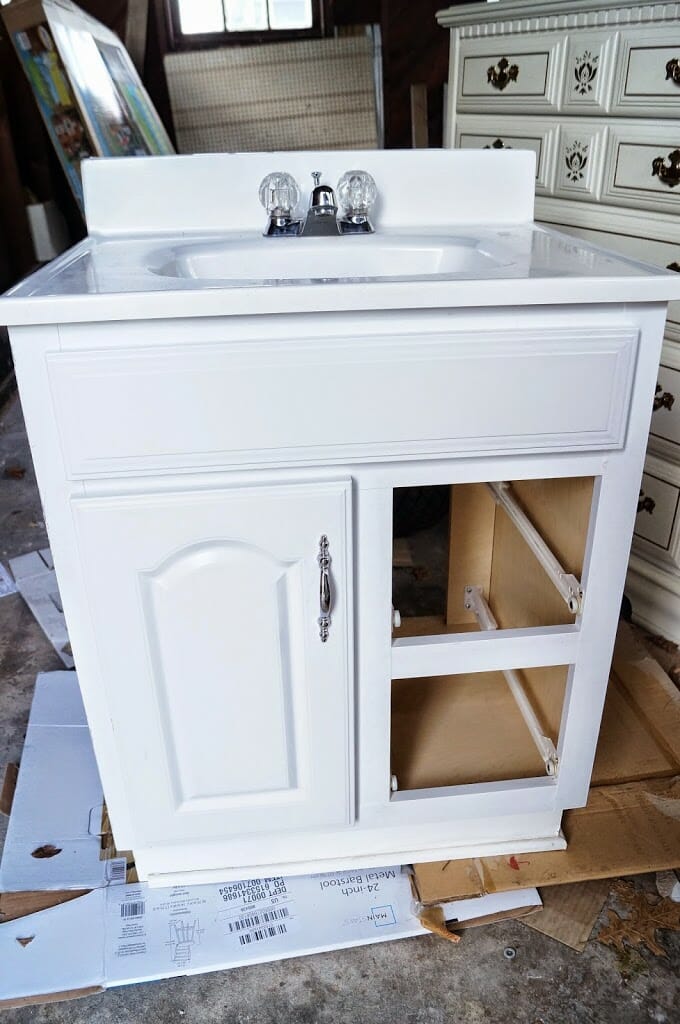
There was no sink before. You had to wash your hands in the laundry tub.
The vanity we decided to use was my parents and they were throwing it away. I painted it and changed the hardware and it looks brand new now!
Before:
The drawers had a bit of catastrophe on the way to our house and were being repaired, that’s why they are not pictured.
After:
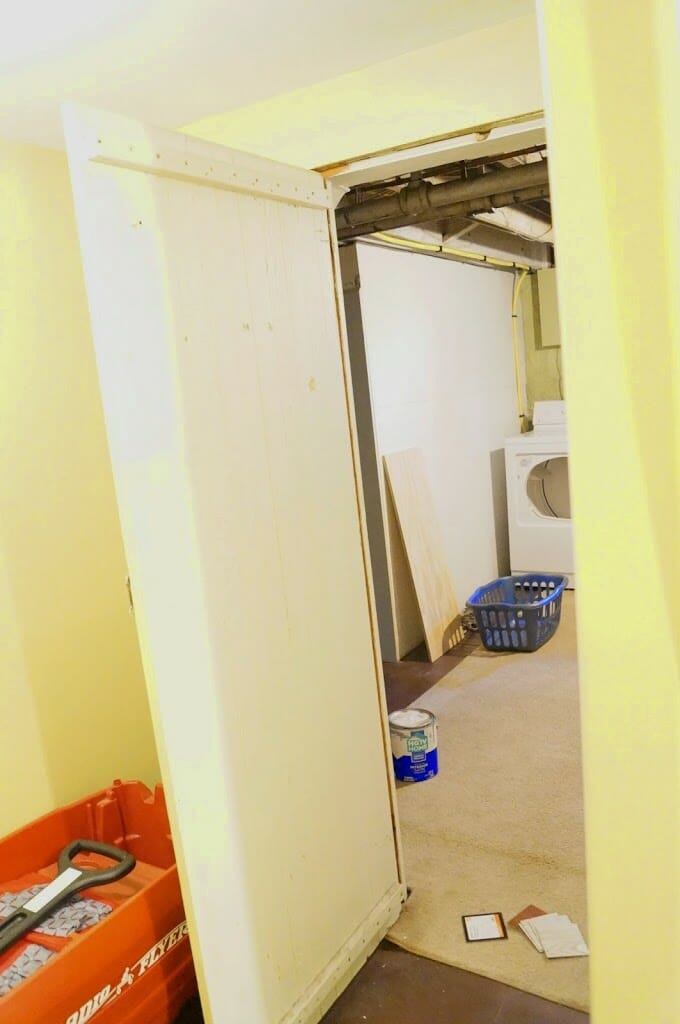
The entrance to the bathroom used to be through the laundry room, which wasn’t a layout that we loved. This picture is if you were standing in the bathroom looking into the laundry room.
This area has been closed up and now the entrance comes from the family room/playroom.
Oops, forgot to paint the back of this door.
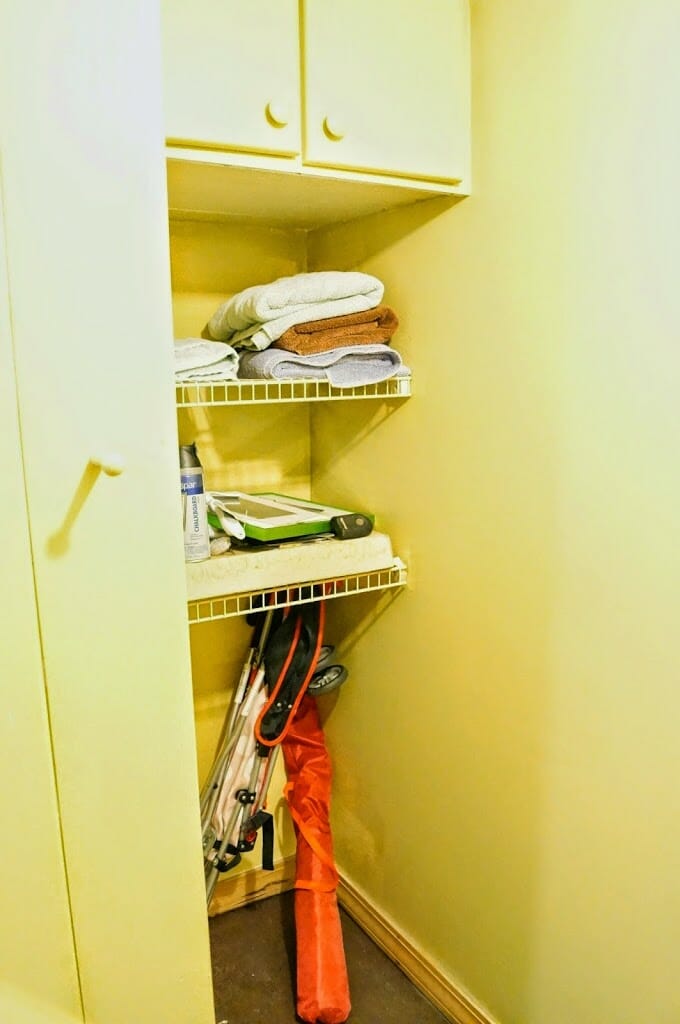
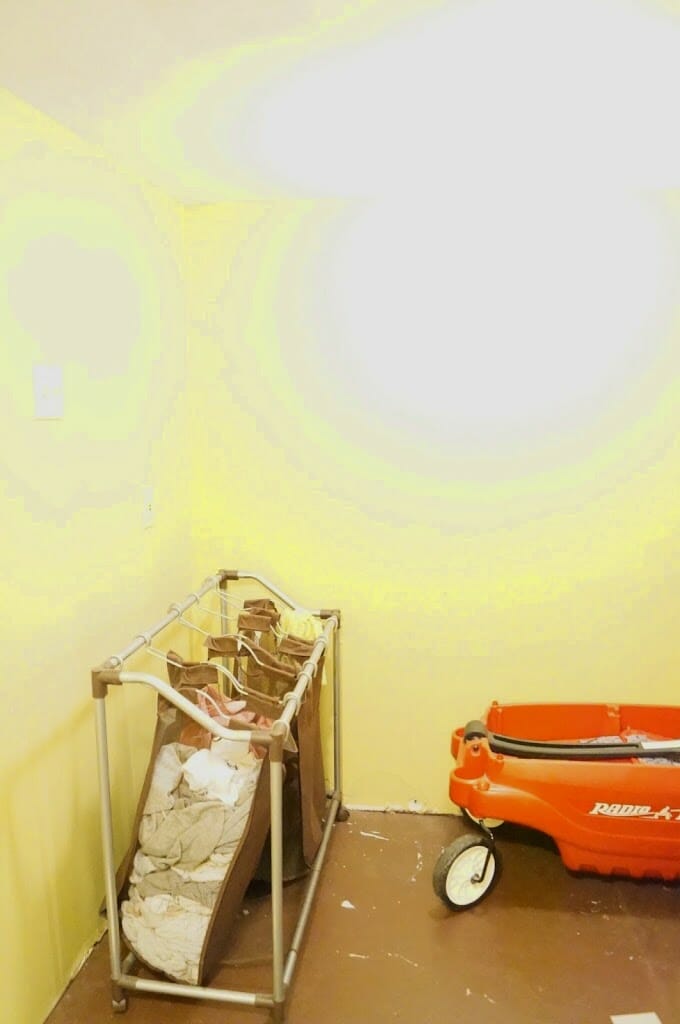
This corner was a mishmash of toy storage and our hamper.
This picture really captures just how bad the lighting was in here before. It is blinding on those walls! The new recessed lights make SUCH a difference!
Now it looks much better and this ladder shelf provides some additional storage.
Here are a few more shots
We are so happy with how it turned out! I just need to build those shelves and paint the back of the door and then I can call this project OFFICIALLY done! To see what paint we used, what type of floor we installed and a tutorial on the wood towel rack and bath sign, go HERE Bathroom Remodel Part 2. To see the DIY Wood Shim Art on the entrance wall, go here! Thank you for checking out our DIY Budget Bathroom Remodel Reveal!
30 thoughts on “DIY Budget Bathroom Remodel Reveal”
it looks great! LOVE the orange with the grey and navy!!
Thank you Cheryl!
What an amazing transformation. I love the Bath sign, did you make it?
I did Angel! Check back next week for a tutorial! It was super easy!
Looking forward to it!
The tutorial is up now!
What an adorable bathroom!
Thank you!
Love this bathroom, colors and floor! 🙂 It was a lot of work, but you did a fantastic job! 😀
Wow, seriously loving this bathroom and all the colors you used!! Great job, gave me some ideas for my own bathroom makeover!
I love the way this bathroom turned out. It looks so great and I can’t believe how affordable it was. I have been bugging my husband for a while now to redo our bathroom because it just looks gross and need a new fresh look. I wish that I could get my bathroom to look this good. https://www.twobyfourconstruction.com/Bathroom_Remodels_Deck_Repairs_Manassas_VA.html
It was very affordable! Good luck with your remodel!
Thank you! It is Allure Traffic Master flooring from Home Depot. I absolutely love it and it was a breeze to install. I will be checking out your remodel, thanks for sharing!
Wow what a beautiful change! I have to say that rock cement wall before was interesting. But I also totally understand why you would want it covered. It looks so bright and cheerful now! Great job!
We left the rocky cement wall in the playroom. It is interesting, but a beast to paint because it is so slippery! I am glad we went with the drywall int this case!
Holy cow, that is quite a transformation! It looks a-maz-ing! Awesome job!
Looks fabulous! Stumbling! 🙂
Thank you!
What a transformation! Wow! Great job on doing so much of it yourselves.
You really did a beautiful job! I love how bright & fresh everything looks. What an improvement.
Sometimes referred to as a rumpus room or a shower room, a cloakroom suite is an area designed specifically for storing personal items while showering. The style of rectangular shower cubicles in particular has become increasingly popular due to its space-saving design, but it also allows you to stock up on shower essentials and keep them easily accessible at all times.


it looks great! LOVE the orange with the grey and navy!!
Thank you Cheryl!
What an amazing transformation. I love the Bath sign, did you make it?
I did Angel! Check back next week for a tutorial! It was super easy!
Looking forward to it!
The tutorial is up now!
What an adorable bathroom!
Thank you!
Love this bathroom, colors and floor! 🙂 It was a lot of work, but you did a fantastic job! 😀
Wow, seriously loving this bathroom and all the colors you used!! Great job, gave me some ideas for my own bathroom makeover!
I’m so glad you got some good ideas!
Wow! You did a really great job! I’m trying to remodel my bathroom. I hope it comes out as good as yours. https://www.gfhandyman.com/Bathroom-Remodels.html
I love the way this bathroom turned out. It looks so great and I can’t believe how affordable it was. I have been bugging my husband for a while now to redo our bathroom because it just looks gross and need a new fresh look. I wish that I could get my bathroom to look this good. https://www.twobyfourconstruction.com/Bathroom_Remodels_Deck_Repairs_Manassas_VA.html
It was very affordable! Good luck with your remodel!
Interesting blog. It would be great if you can provide more details about it.
Bathroom Remodel Colorado Springs
I LOVE LOVE your remodel. What kind of floor is that? I’m in the middle of remodeling mine https://thenewdaybringshope.blogspot.com/2015/01/bathroom-remodel-in-progress.html
Thank you! It is Allure Traffic Master flooring from Home Depot. I absolutely love it and it was a breeze to install. I will be checking out your remodel, thanks for sharing!
Thank you for that information!
Wow what a beautiful change! I have to say that rock cement wall before was interesting. But I also totally understand why you would want it covered. It looks so bright and cheerful now! Great job!
We left the rocky cement wall in the playroom. It is interesting, but a beast to paint because it is so slippery! I am glad we went with the drywall int this case!
Holy cow, that is quite a transformation! It looks a-maz-ing! Awesome job!
Looks fabulous! Stumbling! 🙂
Thank you!
What a transformation! Wow! Great job on doing so much of it yourselves.
You really did a beautiful job! I love how bright & fresh everything looks. What an improvement.
Thank you!
Sometimes referred to as a rumpus room or a shower room, a cloakroom suite is an area designed specifically for storing personal items while showering. The style of rectangular shower cubicles in particular has become increasingly popular due to its space-saving design, but it also allows you to stock up on shower essentials and keep them easily accessible at all times.