One of my favorite things about our new house is that we have a large foyer that is perfect for holiday decorating. The tree lines shining through the leaded glass windows make me happy every time I see them!
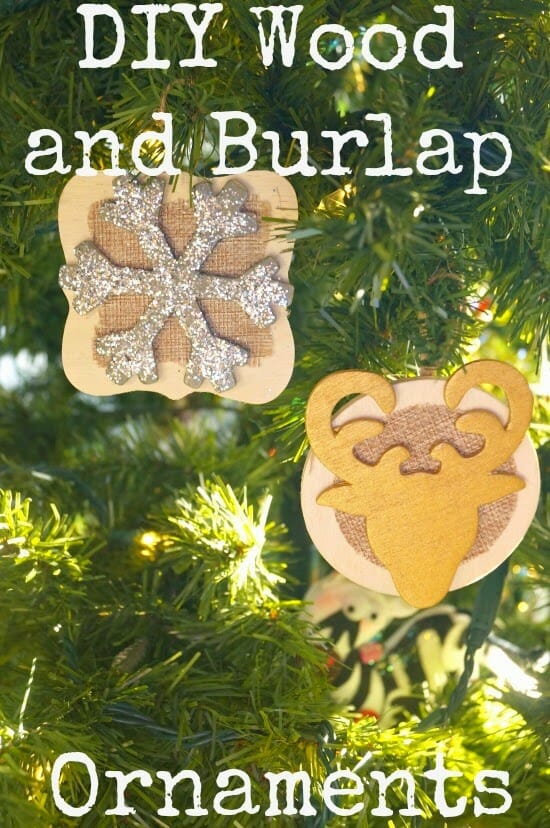
I want to try something a little different this year. Our main Christmas tree is full of ornaments that have special meaning to us. I have collected ornaments over the years from vacations and family members and we have tons of beautiful Hallmark ornaments, including princesses, dog pictures, and special moments. While I Iove our hodge podge ornament tree, I have always wanted to do a themed tree and love seeing all the beautiful pictures bloggers put up of their trees decked out in a common theme. Since I am loving the rustic look this year, I have decided to put up a second tree in our dining room full of rustic elements. This was kind of a last minute idea, so I am starting from scratch and don’t have any rustic ornaments already. I am planning on purchasing some elements for the tree, but also want to create some ornaments.
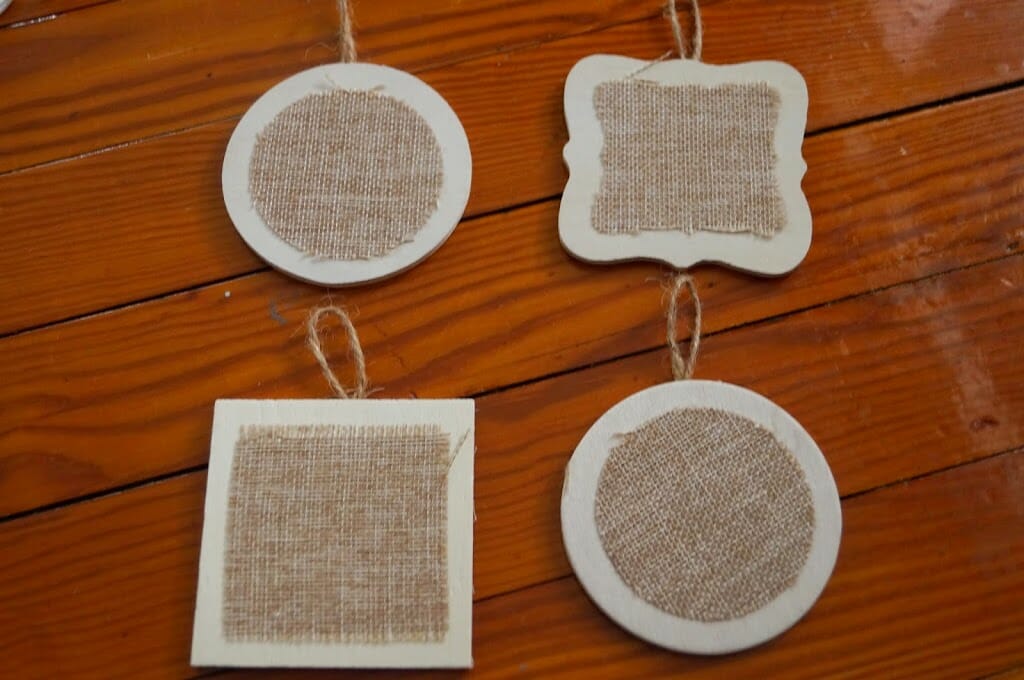
After a quick trip to Michael’s I found these wood plaque ornaments with a tiny piece of burlap on them. They seemed like the perfect canvas to create a beautiful ornament. These were really inexpensive too. Less than 1.00. I used a coupon and they were on sale, so I think they were around .75 cents.
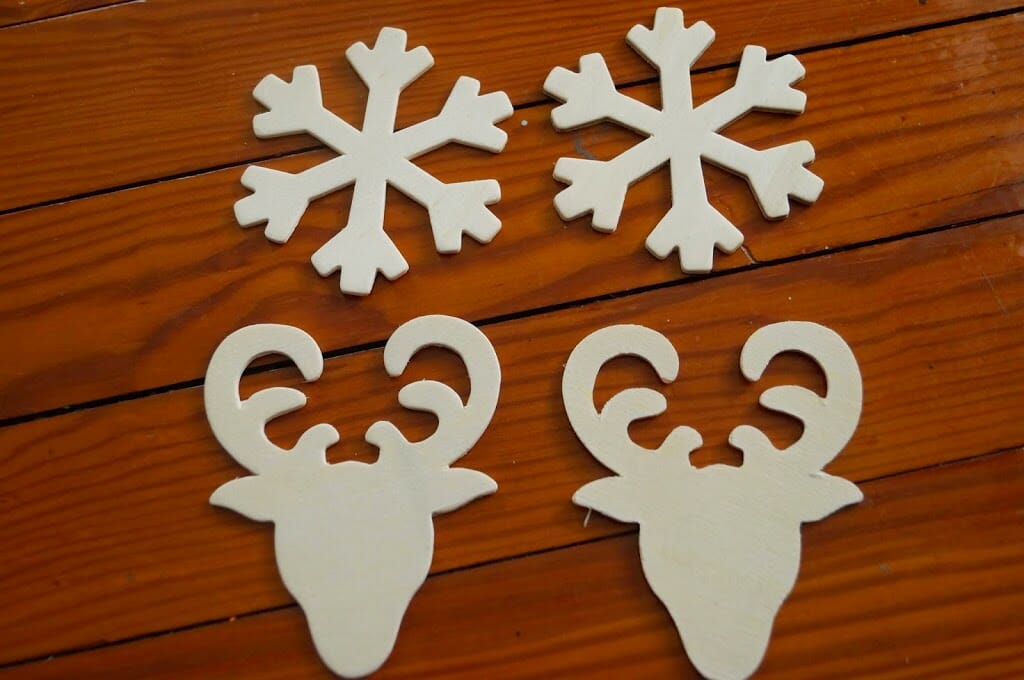
To top the plaques off, I thought these wooden cut outs would be perfect. These were .29 cents plus a 20 percent off coupon, so super inexpensive!
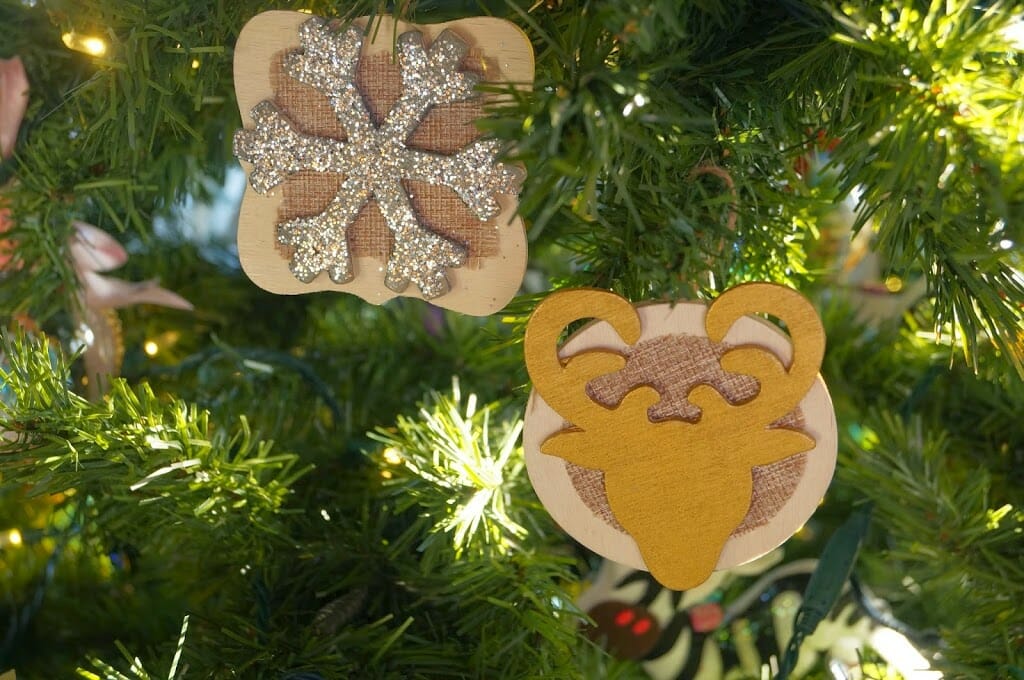
I gave the cut outs a quick coat of acrylic paint. The snowflakes I did in dark gray and the reindeer in gold. While the gray paint was still wet, I quickly sprinkled silver glitter all over them and shook the excess off over a tray. To ensure I didn’t have glitter all over my house, I sprayed these with Modge Podge Acrylic Sealer, which helps the glitter stay put. There’s nothing I hate more than rogue glitter in all the crevices of my floor!
And here they are! I think they will add the perfect rustic glam touch to my new tree! I will add pictures once the tree is up and decorated!
One thought on “DIY Rustic Wood and Burlap Christmas Ornaments”
Comments are closed.