This easy DIY No Sew Bench Cushion takes about 15 minutes to make and no needle and thread required! My favorite type of fabric project!

This Easy DIY No Sew Bench Cushion is currently my new favorite project!
Whew! I haven’t posted anything non food related in so long! We’ve been so busy working on finishing up the bathroom that all my crafts, like the DIY No Sew Bench Cushion, have gotten pushed aside! The bathroom is almost finished and I can’t wait to share it with you!
I did get time to work on two small DIY’s over the weekend and I’m excited to share this Easy DIY No Sew Bench Cushion and bench re-do with you!
Looking for more no sew projects?
Check out another no sew bench cushion here, curtains here, and a no sew children’s bed canopy here!
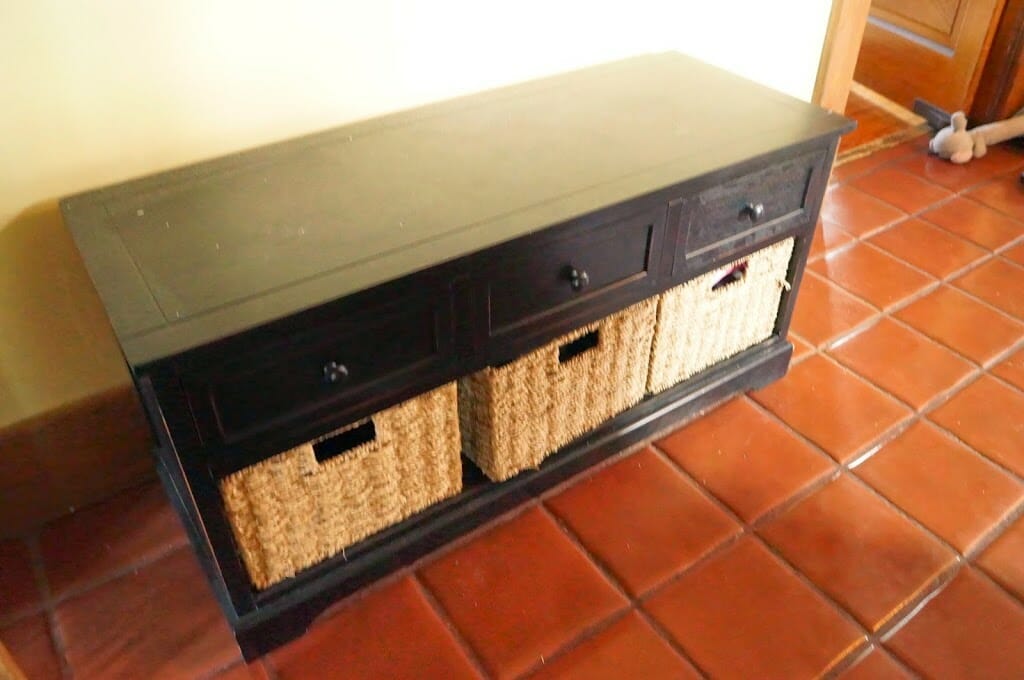
You’ve seen this bench featured here when I showed you how to paint furniture without sanding, and also here when I ripped down the ugly coat hooks and hung DIY Wood Clipboards. This poor bench has gotten around! This is what he (yes, the bench is a he) looked like when he first started.
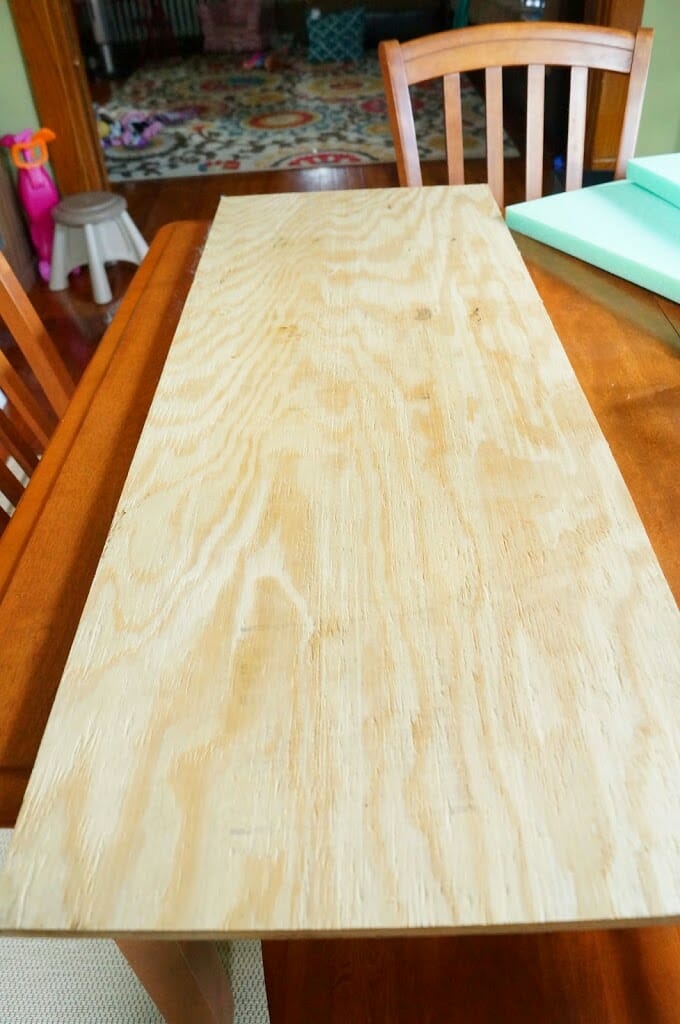
Upholstering is much easier than you think. Here’s what you need to upholster a bench without sewing
- 1 piece of plywood, cut to the dimensions of your bench
- foam to fit your bench (here on Amazon)
- 1 yard of batting (here on Amazon or here)
- 1 yard of fabric (here on Amazon)
- Staple gun (here on Amazon) I love this one!
- Spray Adhesive (This one from Amazon is extra strong and holds so well)
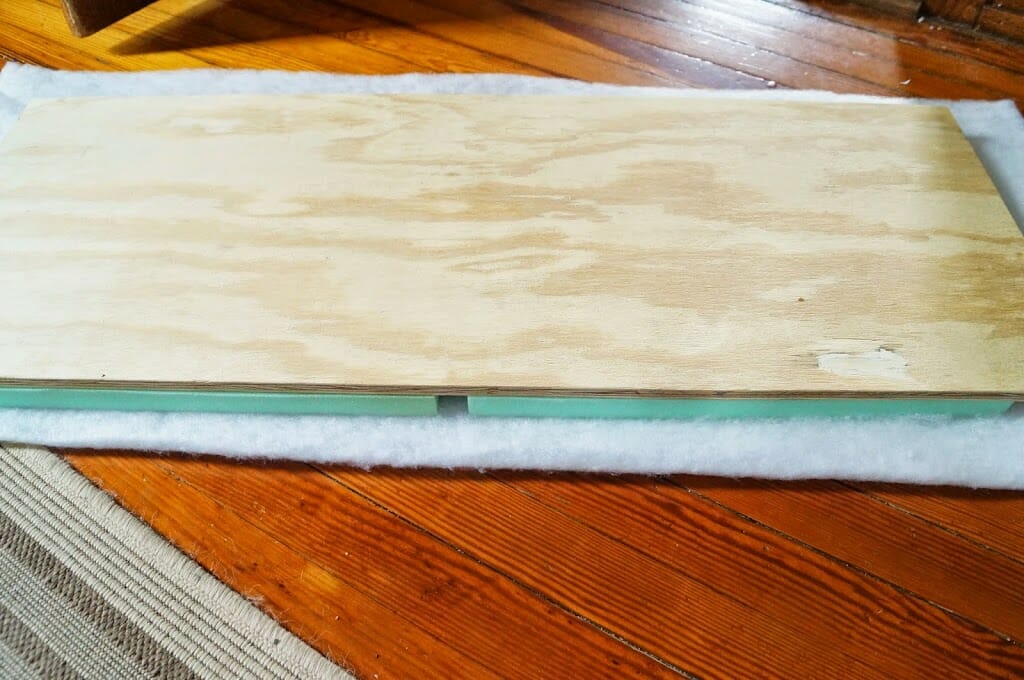
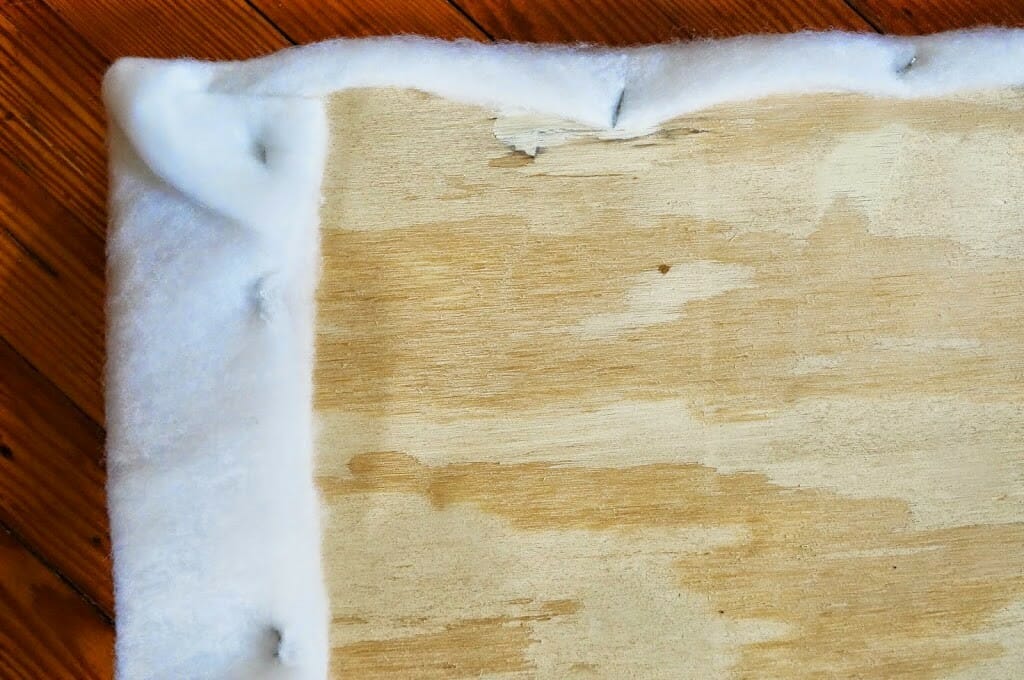
Step 1: Spray a thin layer of spray adhesive down on your plywood and put your foam on top.
Step 2: Lay your batting down on the floor.
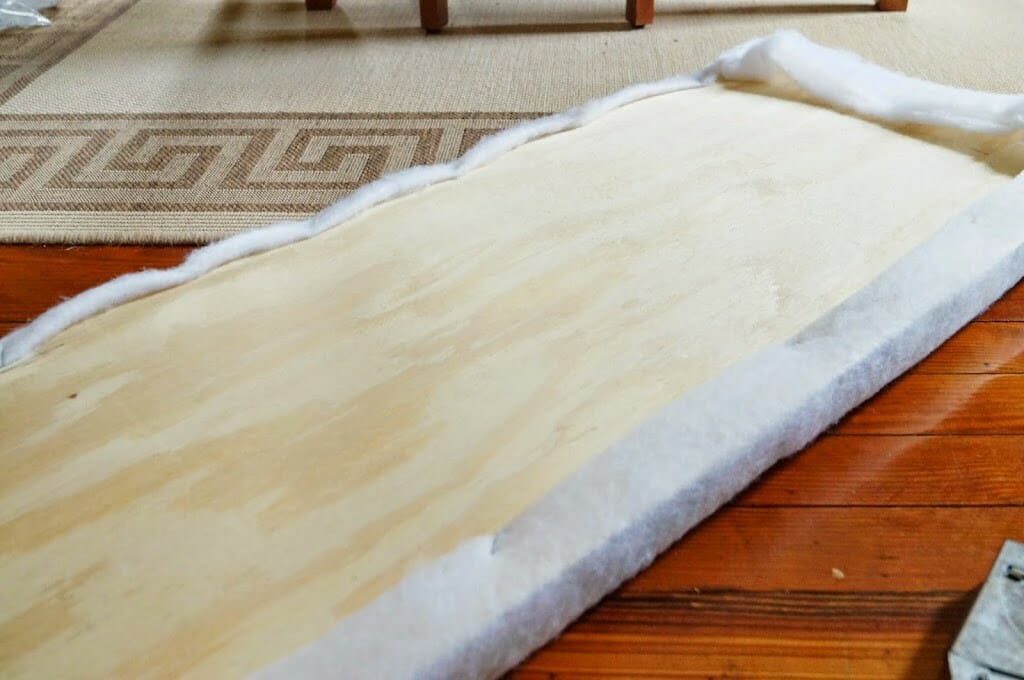
Step 3: Wrap your batting up around the edges and staple every 6 inches or so.
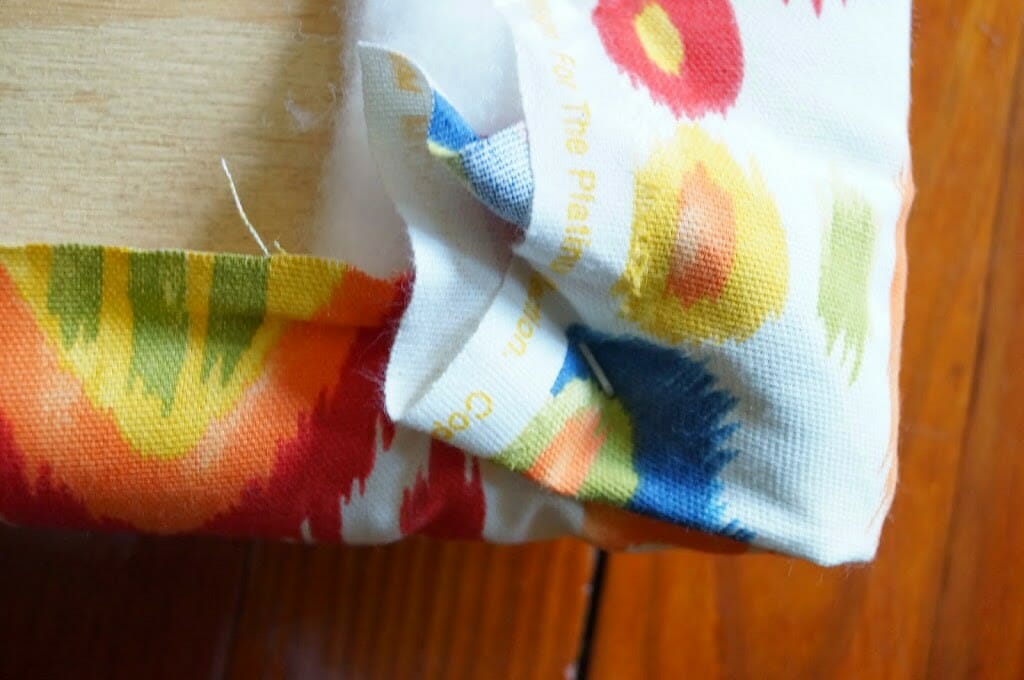
Step 4: Lay your fabric (iron it first) face down on the floor.
Lay your batting wrapped plywood on top and wrap it around and staple right on top of the batting.
Wrap the corners tightly like a present and staple.
Remember that no one will see what it looks like on the bottom, so tuck as much as you need to to make it nice and tight.
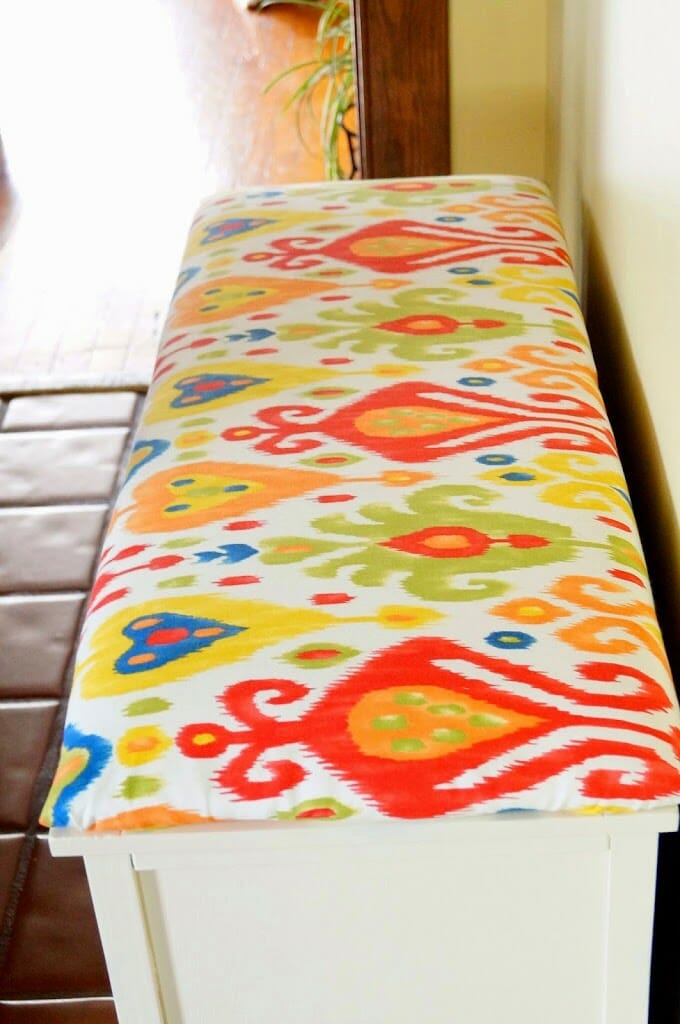
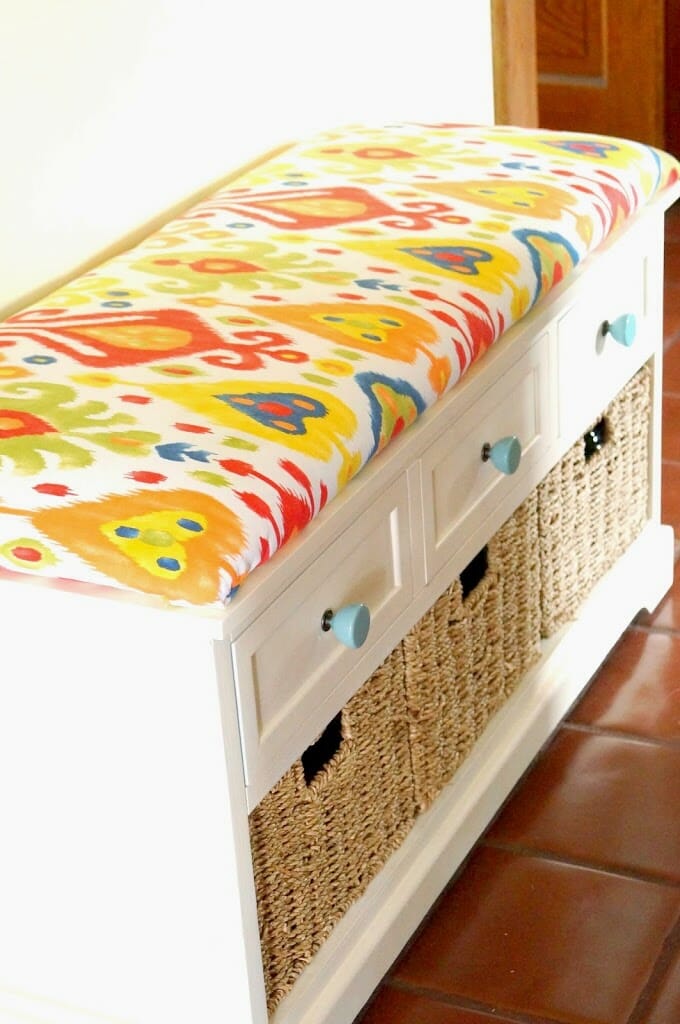
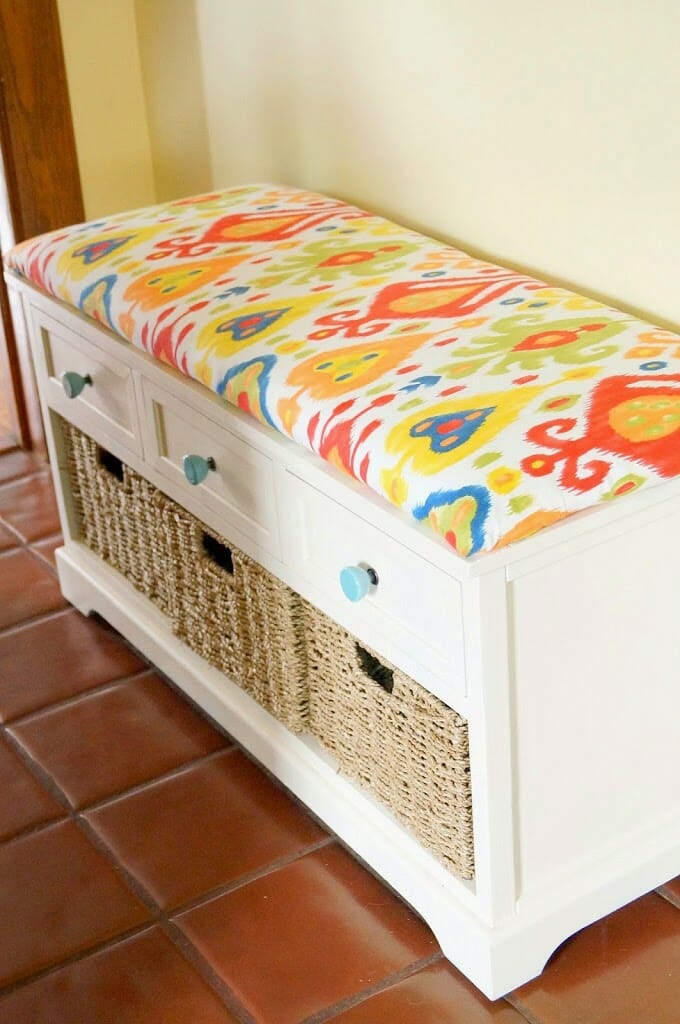
No Sew Bench Cushion: Before & After
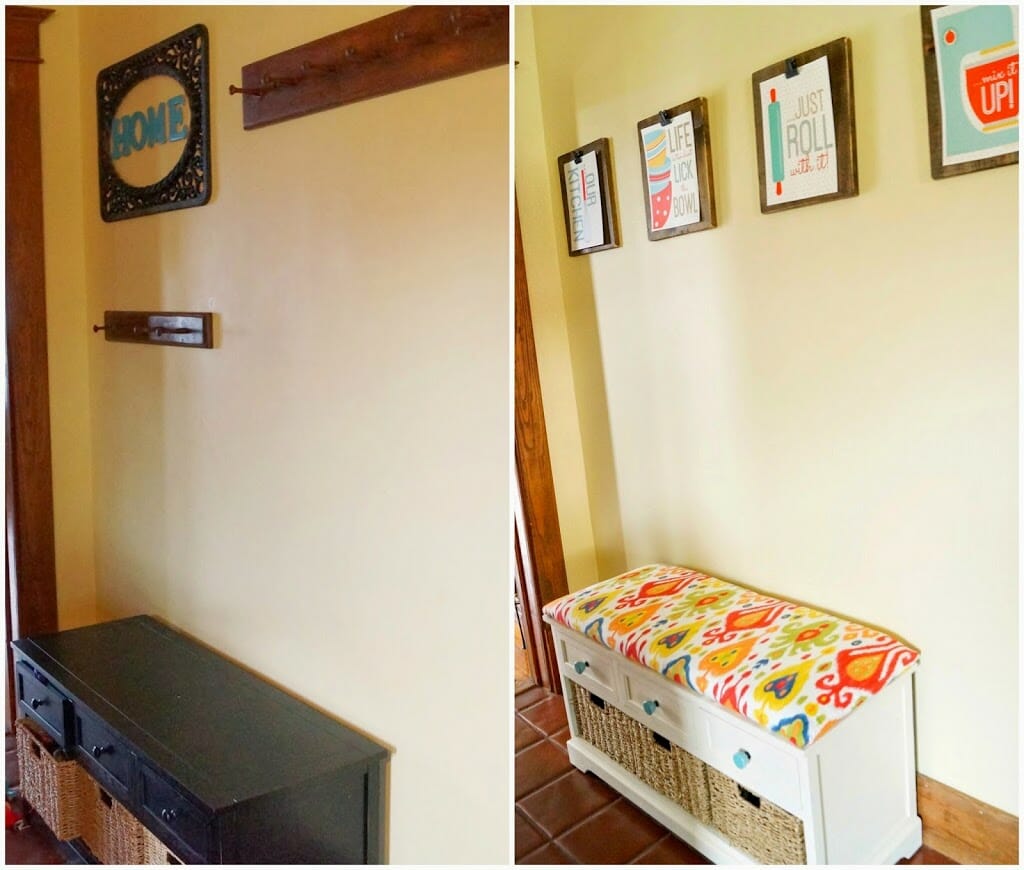
What a great refresh! It is so bright and cheery now, and I love those fun clipboards!
Thank you!! I love how it turned out!
I love what you have done to the bench – love the colours 🙂
Thank you! I’m not normally a yellow person but I am loving it here!
A few months ago I sewed a bench cushion for my sister in law. I wish I came across this idea sooner! Thanks for sharing at Pin Your Friday Favorite!
I wish I could sew! Jealous!
I need this for my laundry room. I have all the stuff, just need a few minutes!! Gorgeous!
Very Cute! I love the fabric! – Found you through the DIY Showoff
I <3 your bench refinish an fabric! Pinning
Looks great!! I pinned this to our talent board over at DIY Sunday Showcase! Thanks for sharing with us!
Shelly@minettesmaze
That looked so easy. I need to do this for my pallet seating outside. Here I was all worried about how to make them and you made it super easy for me. Thank you.
Sooo cute. I love the fabric. I also really like the artwork displayed above the bench and how you used clips so you could change them. Genius.
Thank you! I am proud of both the clips and the bench!
Love your chose of fabric, would you please tell me where you bought it from.
I got it at Joanne’s in the back with the Waverly fabrics!
fabulous idea! thank you for sharing! Love the fabric…so fresh!
Does it slide around on the bench? I’ve been wanting to make something similar for a boring bench I have but wasn’t sure how if it would move around too much?
Megan, I put a small piece of that non slip mesh liner that you can buy to line your drawers with underneath it. It slides an inch at the most, but not much!
Hi, I am Anima, found you from the IHeart link party. Nice fabric selection.Colorful and chic. Honestly the fabric caught my eye first. Nice…
Best Regards,
Anima
Oh my goodness! It looks like a completely different bench! I just love what you have done with it! Bravo!
Thank you so much for reading my post and commenting! Your blog has taught me so much!
I LOVE the pattern that you chose!
Thank you Tara!
Oh wow! That is fabulous. I need to add a cushion to some furniture, thanks for the tutorial. Just so you know, Scraptastic Saturdays is the new linky in town. I would love it if you linked up this week. All linked up projects will be shared via FB/Twitter/Pinterest. Hope you come join the party. Have a wonderful weekend.
Thank you! I just stopped by your blog and linked up!
What a difference! I love how cheerful it is 🙂
This is so cute! I love the light and bright look it has now. That pattern is amazing, and those knobs are a great addition too!
Thank you! Our house has so much dark wood in it so I love lightening up the furniture as much as possible!!
Love the colors on the fabric!!!! I just bought a similar looking fabric just today for my dining room chairs. Great update of the bench.
I love upholstered dining room chairs! I bet your fabric will look fantastic!
Looks amazing!! You did a great job! Thank you so much for this, I’m always looking for no sew fabric ideas!
Me too! I love no sew projects!
Hi! Love the bench. So very cheery with the fabric and cute knobs. I had to laugh because I totally found the camper foam at Home Depot but only after two salespeople spent 15 minutes on walkie talkies. Its in the carpet aisle, on a higher shelf that required a ladder to get to. Its high quality for the price and a nice big piece too. https://www.homedepot.com/p/Future-Foam-3-in-Thick-Multipurpose-Foam-10030BULK3/203837114
Thank you! I will have to try that!! I need some foam for a headboard so I will have to try again. Those store employees thought I was crazy!!
I really like your writing style, good info, thanks for putting up .
Where did you find the artwork above the bench? I’ve been looking for something exactly like that colorful “lick the bowl” sign for my kitchen!
Hi Kara! It was a free printable from the 36th Avenue Blog and I made the clipboards. This post shows how I did the clipboards and also has the link to the free printables!https://www.oldhousetonewhome.net/2014/05/diy-wood-clip-boards-with-free-kitchen.html
I love how your bench turned out! That fabric is awesome.
Thanks Kati! I love this fabric, too!
Great tutorial. I’ve been debating making an ottoman myself, after seeing this I might just do it!
This would be a great way to upholster an ottoman!
I remember seeing this before, and fell in love with the bright fabric then. It is soooo pretty! I need everything no sew, I am not blessed to know how to even sew a straight line.
haha me neither! I don’t know if I could even thread the machine correctly!!
What a great makeover! I love the knobs and the fabric you used was so bright and cheery!
Thanks Amy! I love how it came together!
This turned out so pretty. Thanks for the tutorial.
You had me at NO SEW!! This is great and do able! Love the pattern you picked and it def makes your knobs stand out! Great job.
Thanks Sara! I am glad I am not the only no sew fan!
Amanda, this is GREAT! Love it, I am pinning for later since I can NOT sew!
Oh my, I can’t believe how much better “he” looks now!! Awesome transformation – pinning!
Thanks Jenny!! He is so much cuter now!!
Love this!! The white really brightens it up, and the fabric is so fun and colorful!
Thanks Meg! The white is so much better! I can’t believe that I even picked out a black bench…it is crazy how quickly our taste can change!
Would hot glue work instead of staples? Thanks!
Is the cushion going to get a lot of use? or more decorative? Hot glue will probably hold the fabric down but I don’t think it would hold up as long and you won’t be able to pull it as tight. Let me know if you try it!
Sorry, I loved it before the project. It just fits my color scheme and taste.
I don’t really like black furniture, but it was a great bench to begin with and would look great in a lot of peoples’ homes as it was before the makeover!
Would Velcro be strong enough to hold the finished product in place??
Nori, do you mean to attach the cushion to the bench or to secure the fabric to the plywood?
I Love Love your bench!!! Please, please tell me where to get that fabric? Thank you!! <3
Thank you Nancy! Its from Joanne’s!
This is a silly question, but how did you affix the completed cushion/plywood to your bench? Did you use wood glue or screws/nails?
Hi Rebecca! I actually didn’t attach it! It just sits on top. That way, I can change the fabric without damaging the bench! My wood was coarse enough that it does not slide. If you want to attach it, I would use wood glue!
is there any equipment that give us lower cost?
This is a great tutorial! I’m going to make one for my porch.