Setting up an SUV tent doesn’t have to feel complicated. An SUV tent attaches to the back of a vehicle and can be set up in just a few minutes by securing the poles, connecting it to the hatch, and staking it to the ground. This simple process creates extra space for sleeping, storage, or relaxing while keeping easy access to the vehicle.
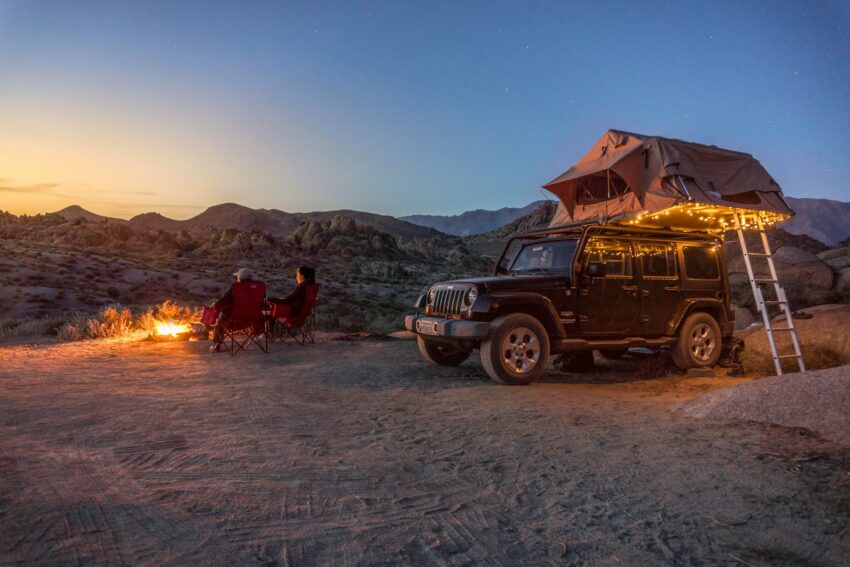
Many campers choose SUV tents because they provide shelter that works with the car instead of separate from it. By attaching directly to the hatch, the tent expands the living area and makes it easy to grab gear without stepping outside. With the right preparation and a clear step-by-step approach, anyone can get their tent ready quickly and start enjoying the campsite.
Knowing how to set up an SUV tent before heading out saves time and avoids frustration. Once the basics are clear—laying out the tent, inserting the poles, attaching it to the hatch, and securing it—you can focus on enjoying the trip instead of wrestling with equipment.
Key Takeaways
- SUV tents connect to the back of a vehicle for added space and convenience
- Preparing gear and choosing a good setup spot makes the process smoother
- A clear step-by-step method keeps setup quick and stress-free
Preparing for SUV Tent Setup
Good preparation makes setup smoother and prevents problems once camping begins. Paying attention to tent selection, packing the right gear, and checking vehicle fit helps avoid delays and keeps the trip more comfortable.
Choosing the Right SUV Tent
The right tent depends on group size, camping style, and weather conditions. A small two-person tent may work for short trips, while families often need larger models with extra space for gear.
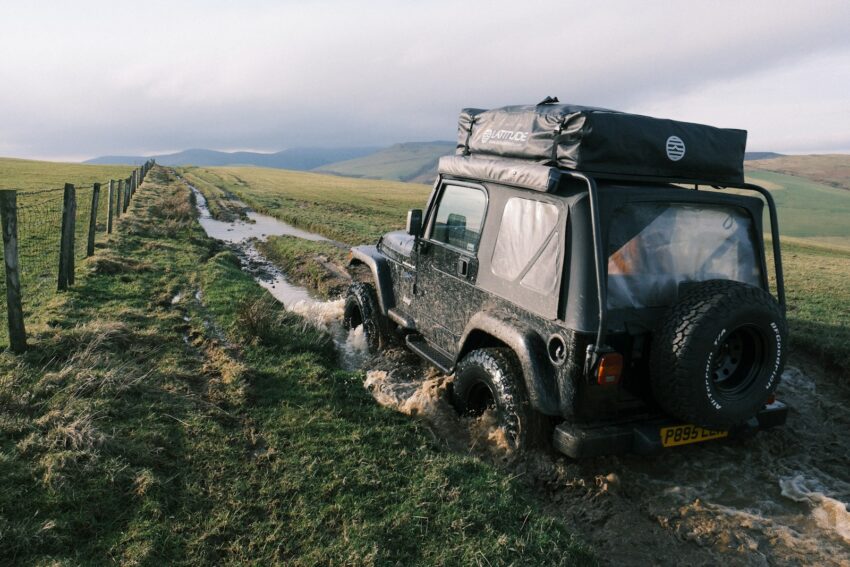
A weather-resistant tent connected to SUV offers better protection from rain and wind compared to a standard freestanding tent. Features like a full rainfly, sealed seams, and mesh windows for airflow can make a big difference in comfort.
Some tents, like this SUV camping tent, are designed to sleep up to six or more people and include a double-layer design for extra rain protection. Larger tents also provide standing room, which helps during long trips.
When choosing, it helps to check how the tent attaches to the vehicle. Some connect directly to the hatchback, while others use straps around the roof or bumper. A snug fit prevents drafts and keeps insects out.
Essential Camping Gear Checklist
Besides the tent, campers should bring items that make setup and living more practical. A short checklist helps keep track:
- Ground tarp to protect the tent floor
- Stakes and guylines for stability
- Sleeping bags or air mattresses for comfort
- Portable lanterns or headlamps for light
- Small tool kit with hammer, duct tape, and extra stakes
Packing extra tarps or an awning gives more shade and rain cover. A folding table and chairs make the space more usable for cooking and eating.
It is also helpful to carry a storage bin for food and supplies. This keeps items organized and prevents clutter inside the tent.
Ensuring Vehicle Compatibility
Not all tents fit every SUV, so checking dimensions before purchase avoids problems. The tent should match the height and width of the rear hatch. A poor fit can cause gaps that let in rain or insects.
Vehicles with roof racks, spoilers, or rear-mounted spare tires may need specific attachment styles. Reading product details and measuring the vehicle are the best ways to confirm fit.
Some tents are designed for hatchbacks or vans, while others work with trucks or larger SUVs. Campers should also think about how much space they want inside the vehicle itself, since folding down seats can create a sleeping area connected to the tent.
A tent that seals tightly against the vehicle makes the setup more stable and helps maintain warmth in cooler weather. This connection also allows quick access to gear without stepping outside.
Step-by-Step SUV Tent Setup Process
Setting up an SUV tent involves preparing equipment, attaching the tent to the vehicle, securing it against weather, and arranging a comfortable sleeping area. Each step builds on the last to create a safe and practical camp setup for car camping.
Unpacking and Organizing Your Equipment
Campers should start by unloading all tent parts from the storage bag and laying them out on a flat surface. This usually includes the tent body, poles, stakes, rainfly, and attachment straps. Keeping items separated helps avoid confusion during setup.
It’s helpful to check that no pieces are missing before beginning. A quick inventory can prevent problems later when the tent is half-assembled.
Organizing tools such as a mallet for stakes, extra bungee cords, or ground tarps can also save time. A tarp under the tent floor adds protection from dirt and moisture.
A simple checklist can be useful:
- Tent body and rainfly
- Poles and stakes
- Straps or sleeves for SUV connection
- Ground tarp or footprint
- Mallet or hammer
With everything sorted, campers can move on to attaching the tent to the vehicle.
Attaching the Tent to Your SUV
SUV tents are designed to connect directly to the rear or side of the vehicle. Campers should park on level ground and set the parking brake before starting. Positioning the SUV so the hatch or side door opens into the tent makes access easy.
Most tents use straps, sleeves, or elastic bands to create a seal around the vehicle. The connection should be snug but not pulled so tight that fabric stretches. This helps keep bugs and rain out.
Some models require feeding poles into sleeves before attaching, while others allow campers to clip the tent to the SUV first. Reading the included instructions can prevent mistakes with fit.
It’s also smart to double-check that the hatch or door can still open freely once the tent is attached.
Securing and Weatherproofing the Tent
Once attached, the tent needs to be stabilized. Campers should insert poles into the proper sleeves or clips, then raise the tent into shape. Stakes should be driven into the ground at an angle for better hold.
Guy lines help keep the tent steady in wind. They should be pulled tight but not so much that they bend poles.
If the tent includes a rainfly, it should be added at this stage. The rainfly creates an extra layer that helps keep the inside dry during rain.
Checking seams and zipper areas is also important. Small gaps can let in water, so adjusting straps or adding extra clips may be needed.
Setting Up the Sleeping Area
After the structure is stable, campers can arrange the inside for comfort. A sleeping bag or inflatable mattress fits well in the SUV tent, depending on space. Some campers prefer to keep bedding in the SUV itself, while others use the ground section of the tent.
The floor should be cleared of sharp objects before laying down gear. A foam pad or blanket under a sleeping bag adds insulation from the cold ground.
Organizing storage bins or bags along the sides keeps the sleeping area uncluttered. Items like flashlights, water bottles, and clothing should be placed where they are easy to reach at night.
Good airflow is also important. Opening mesh windows or vents helps reduce condensation inside the tent while still keeping insects out.
Conclusion
Setting up an SUV tent gives campers more space and easy access to their vehicle. It combines the comfort of a car with the shelter of a tent, making trips more organized and practical.
The process comes down to choosing the right style, attaching it correctly, and securing it with stakes or straps. A simple checklist helps:
- Open vehicle hatch
- Attach tent sleeve
- Insert poles
- Stake corners
- Check fit and seal
With proper setup, the tent can handle different conditions while keeping gear and sleeping areas close to the vehicle. This makes camping smoother and less stressful.
By following the right steps and taking time to secure each part, anyone can create a safe and comfortable camping setup. This method balances convenience with outdoor experience in a straightforward way.