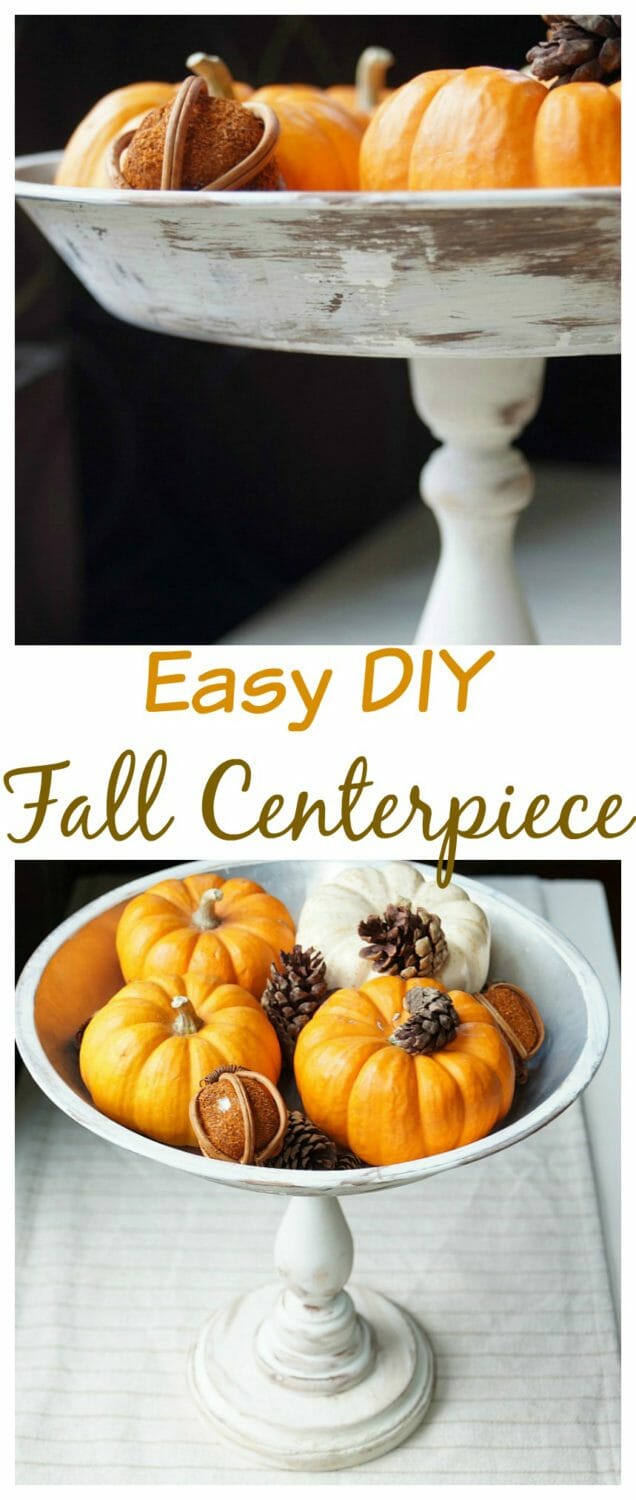
This Easy DIY Fall Centerpiece costs less than five dollars and is so versatile for any holiday or decor!
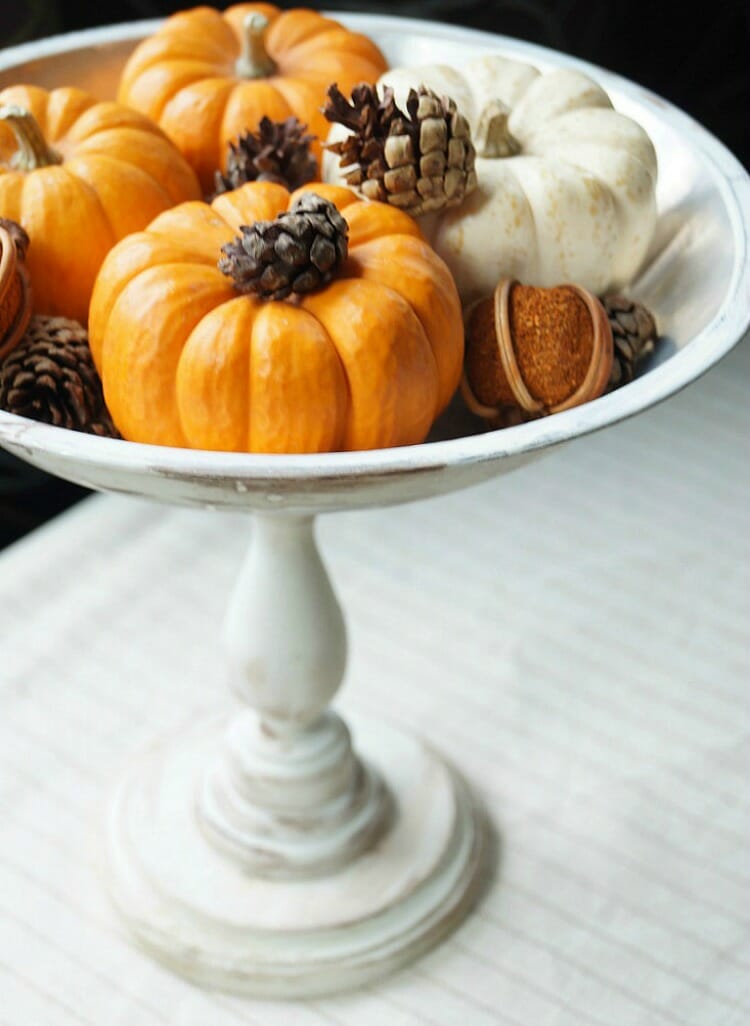
Hey guys! I hope you had a great weekend! I have a fun DIY for you today that I made for less than 5 dollars, with the main item being a 50 cent old beat up pie pan that I found at Goodwill! I debated on what to call this project. Is it a cake stand? A fruit platter? A centerpiece topiary? I have no idea really, but I do love how it turned out!
My original plan was to use it was a fruit bowl in the kitchen. And then I liked the end result too much for it to hide in corner of my kitchen holding fruit. So I decided it would be the perfect receptacle to hold holiday centerpiece decorations. I used mini pumpkins for Thanksgiving, but I think it would be beautiful with glass Christmas balls in it once you are ready for Christmas decorations!
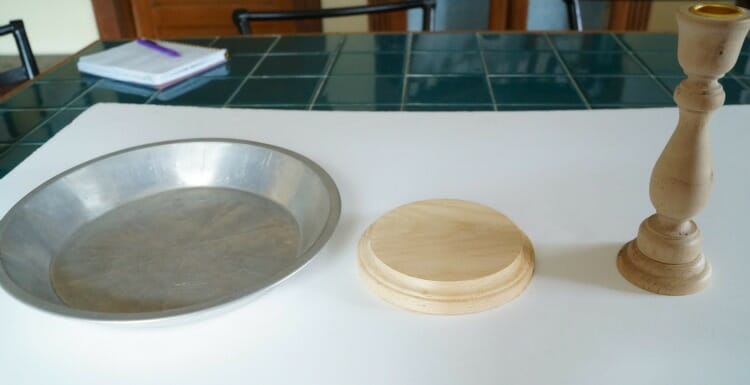
So here’s what you need for this Easy DIY Fall Centerpiece!
A small wooden platter, an unfinished candlestick (both from Michael’s) chalk paint, chalk paint glaze, a pie pan, wood glue, and either sand paper or a sanding block.
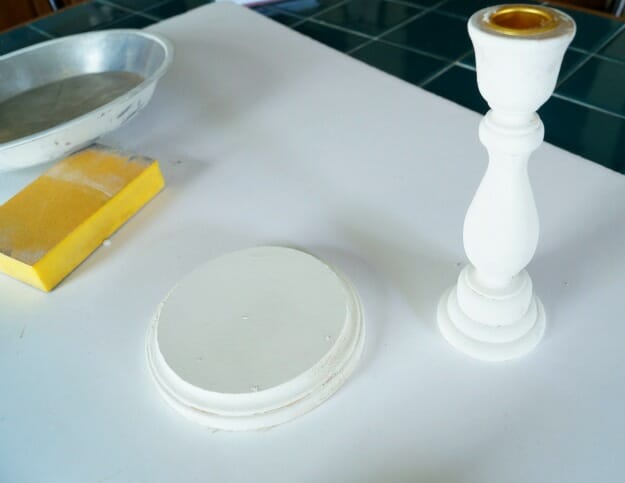
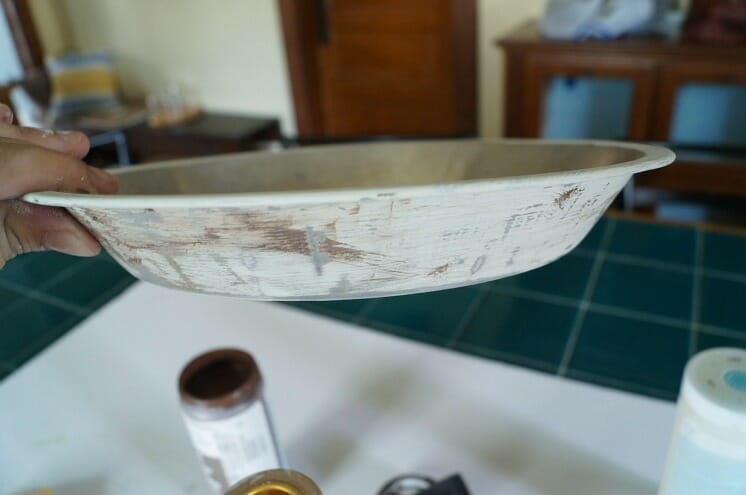
Start by covering the outside of your pie pan and the entire candlestick and platter with the white chalk paint. Put one good coat on and then let dry. Chalk paint dries very quickly, I think mine took less than 10 minutes. I didn’t paint the inside of my pie pan because I want it to remain food safe.
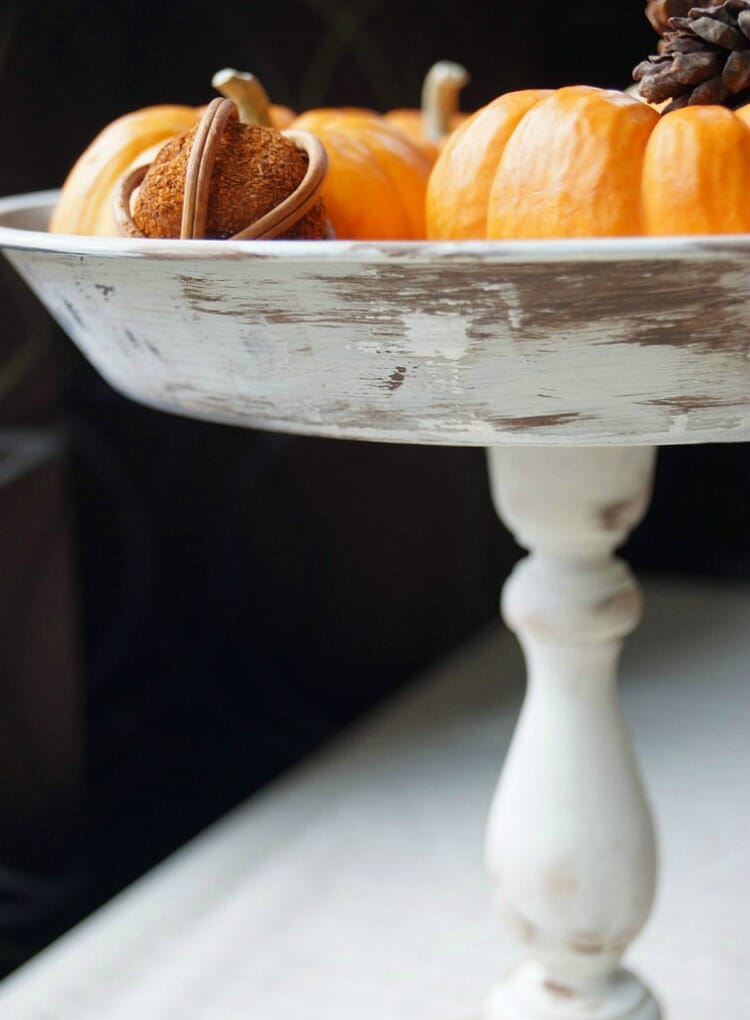
Slap some glaze in spots on all three painted materials. Put in on edges and places were you think would show natural age. Let glaze dry then take your sanding block to it and remove the paint and glaze from spots until you get a look that you like.
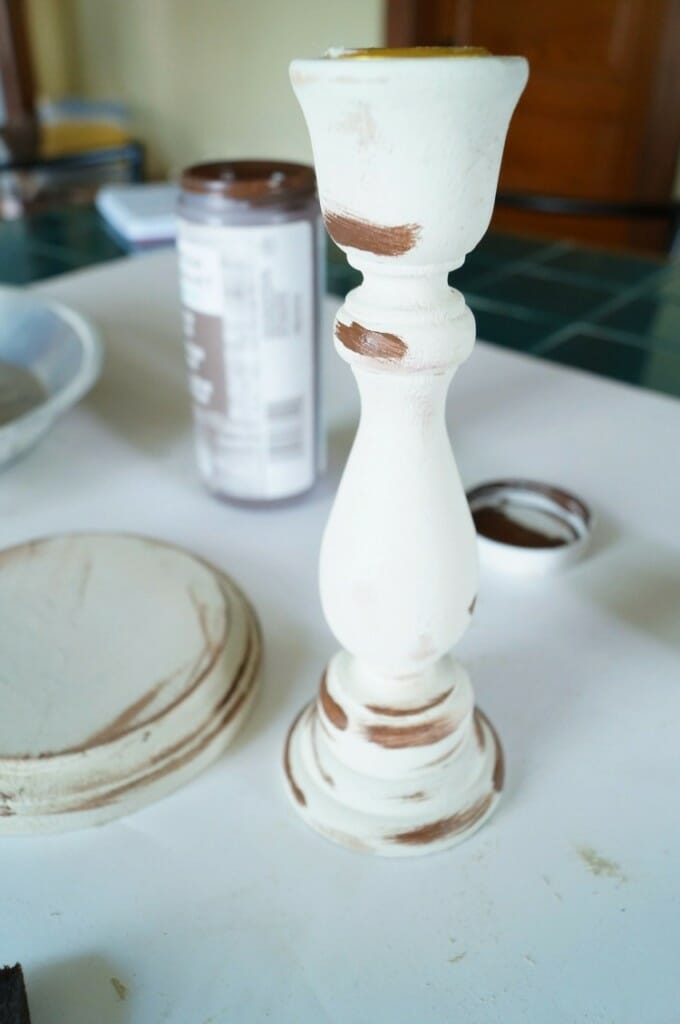
I really roughed up the pie pan to remove both the glaze and the paint.
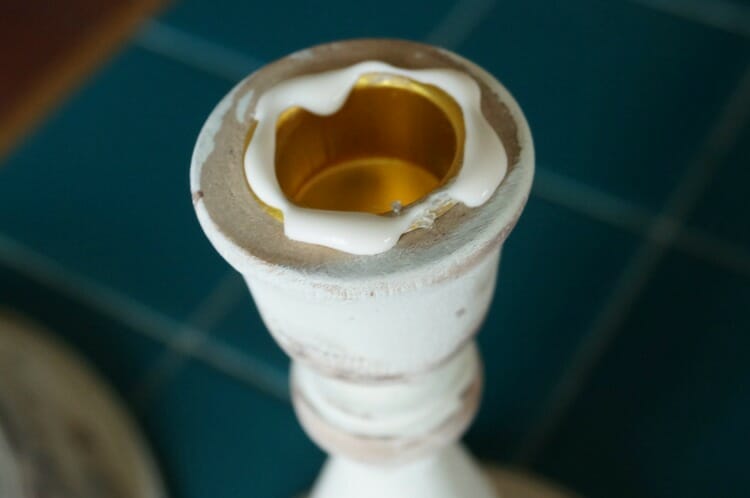
 Now, in this picture you can see that I put glue around the metal insert for the candle. Originally, I kept the cup in there and found that it made too uneven of a surface for the glue to adhere to. I used plier to remove the cup from the candlestick and then reglued it. I would recommend removing the cup before glueing.
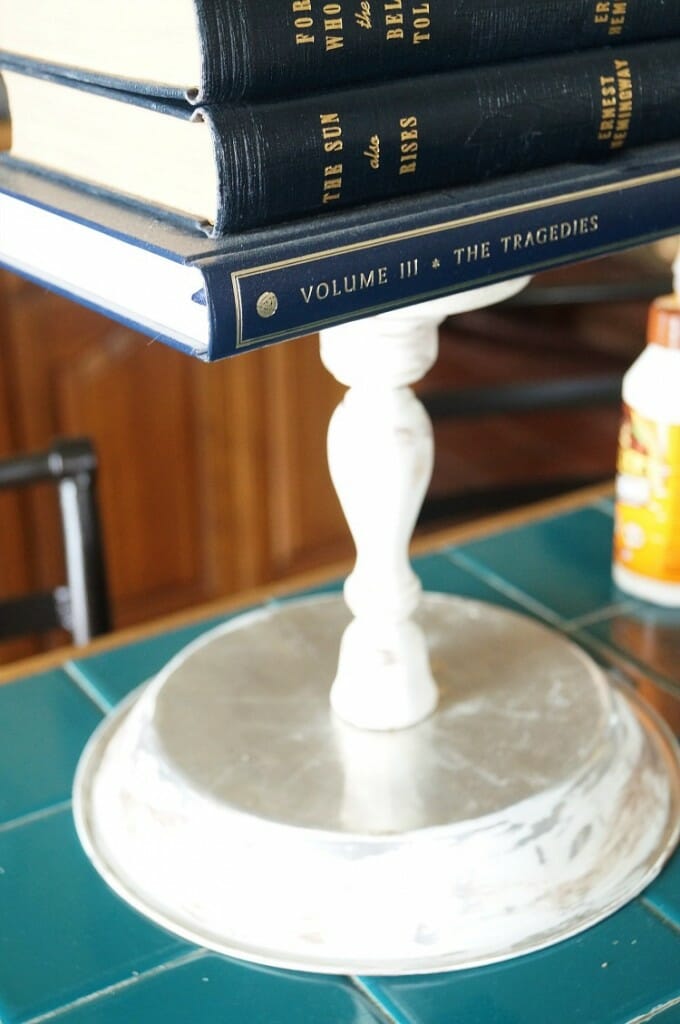
Once you have glue around your candlestick, turn it upside down and place right in the center of the bottom of your pie pan. Put heavy books on top and let dry overnight. I recommend using Gorilla Wood Glue because it is the strongest glue I have found.
Once dry, fill with whatever you like and place on your table! I love these mini pumpkins! These would be the perfect centerpiece for your Thanksgiving table. It would also look adorable filled with cookies, cupcakes or mini desserts on a dessert table.
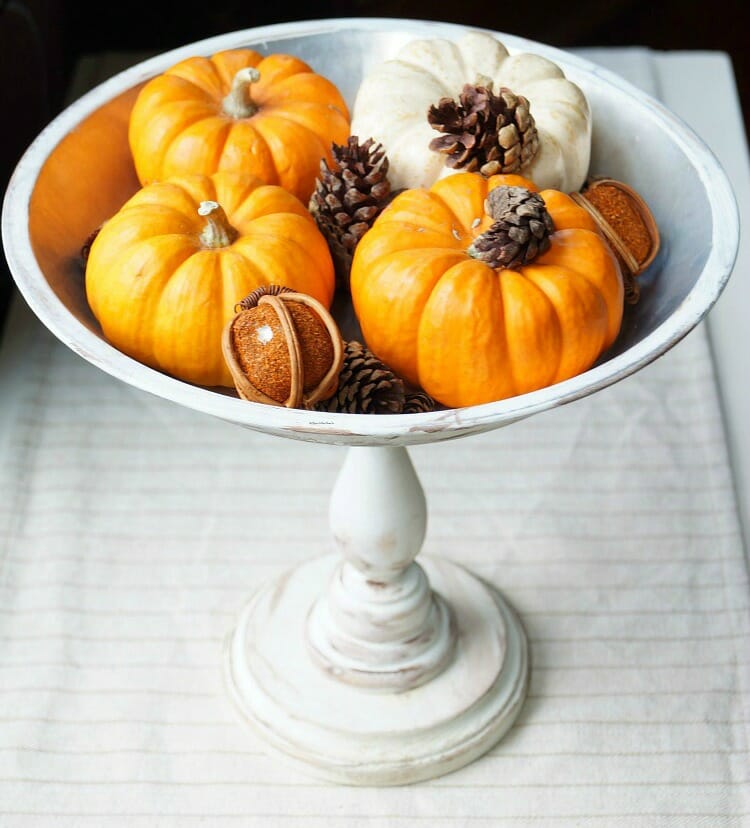
This idea is so versatile and I can see so many uses for it! Throw this together before the holidays and you will have the perfect receptacle for holiday decorations!
Pin this Easy DIY Fall Centerpiece idea for later!
I dont’ know what it is either, but I love it! Pinning!
Such a fab project! I think it was a good call to keep it for centrepieces
What a great idea, to use the candleholder as the base. I LOVE it, pinning!!
Thanks Roxanne!
This is a great idea. Love the distressed look.
Thanks BonBon!
This is a very easy and useful centerpiece for any time of year! I need something like this for my decorating, Love it.
Maria
Absolutely love how this turned out! The rustic distressing is perfect. Pinning!
Thanks Sarah!!
Thanks for sharing! So elegant yet simple.
Thank you Nancy!