
It all started with the painted green box, and then the yarn wrapped wreath, but I am still on a mission to create fun and bright spring decor for our home. Bonus points for projects that I can make without spending any money.
This project was free (for me because I had everything! and only took 3 steps!)
I began by finding this printable spring banner paper from eighteen25 which I printed on white cardstock. The piece were quite big so I knew I was going to cut them down.
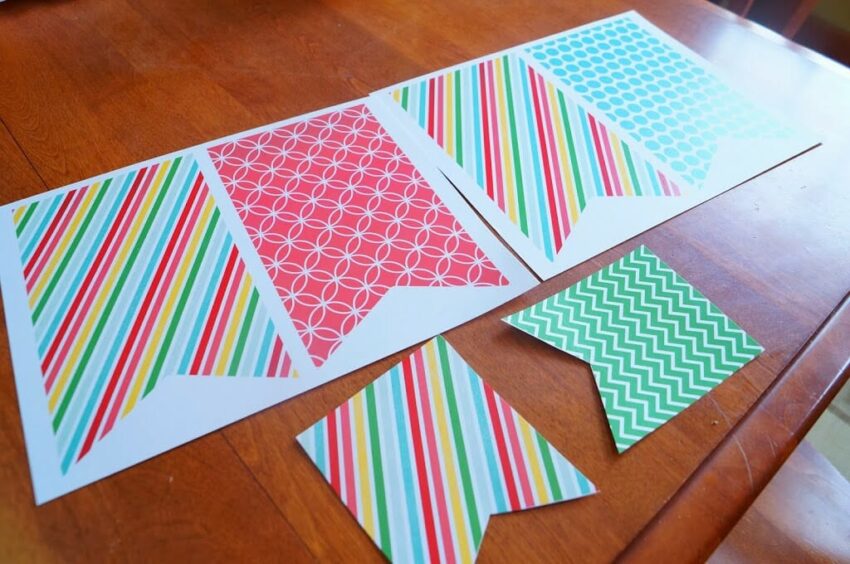
You can see the original size there in the uncut ones.
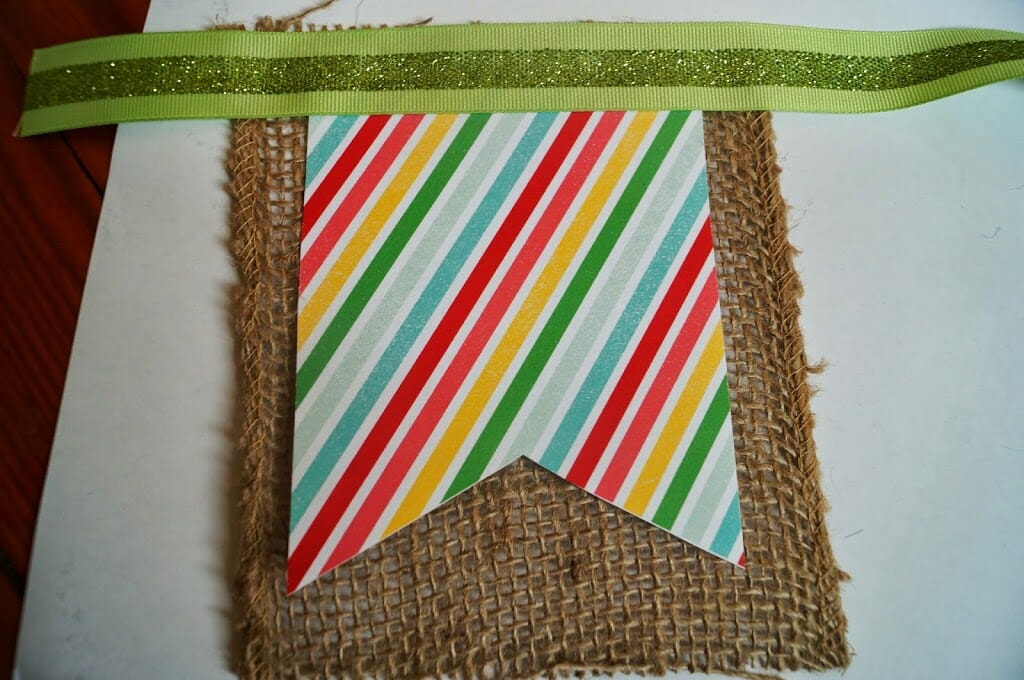
And then hot glued the green ribbon across the top. I used ribbon scraps, but you could use ribbon, twine, or anything else you had on hand.
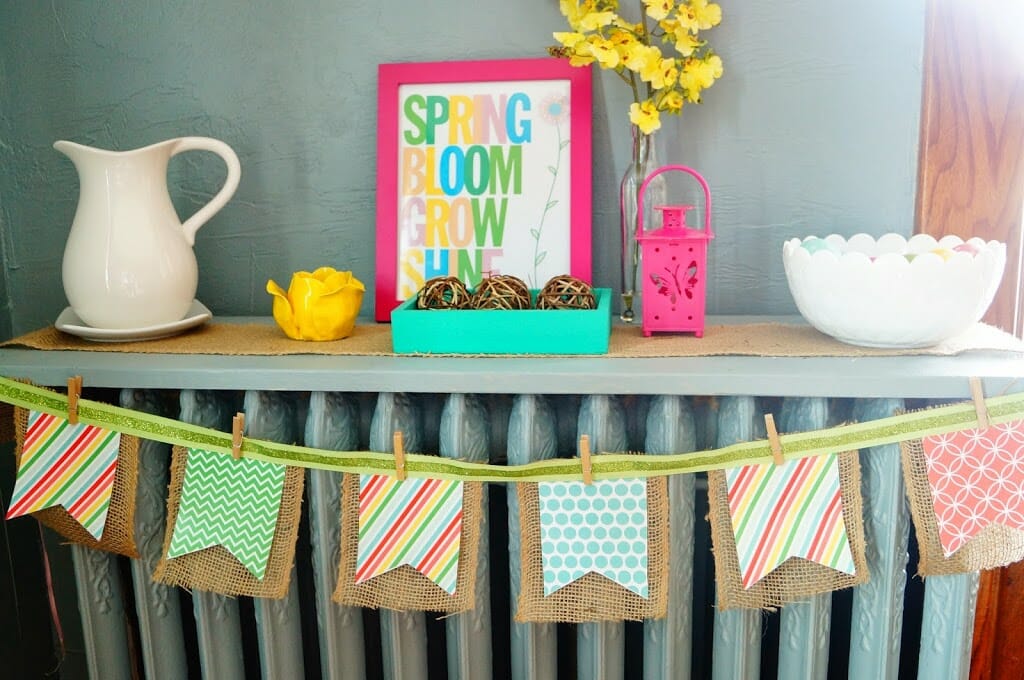
I hung it here on my spring “mantle” with a mish mash of stuff.
Fresh Ideas to Customize Your DIY Spring Banner for Easy Seasonal Décor
Creating a DIY spring banner is a simple and budget-friendly way to add charm and seasonal color to your home. Whether you’re decorating a mantel, entryway, or backyard fence, a homemade banner adds a cheerful touch that celebrates the arrival of warmer weather. With a few creative flourishes, your spring banner can go from basic to beautifully personalized.

Materials and Add-Ons to Elevate Your Banner
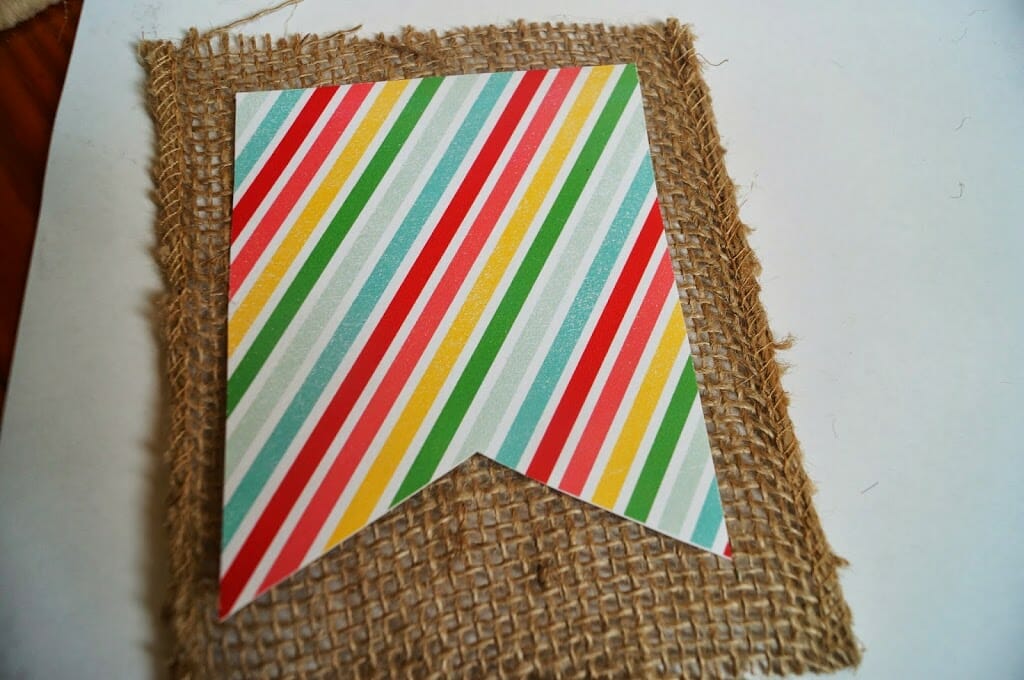
- Burlap or Canvas: Swap out traditional cardstock for a rustic look that adds texture and durability.
- Felt Flowers or Leaves: Glue on handmade felt embellishments in bright spring colors for a soft, dimensional finish.
- Mini Pom Poms or Tassels: Add along the edges or between banner pieces for a playful, festive vibe.
- Wooden Letters or Stencils: Use lightweight wooden cutouts or paint-on lettering for a more polished, long-lasting design.
- Lace or Twine: Replace ribbon with lace or natural jute twine for a farmhouse or cottagecore aesthetic.
Easy Alternatives for Budget and Time
- Printable Templates: Use free printable banner pieces and spring graphics to save time and simplify your layout.
- Upcycled Materials: Repurpose old fabric scraps, greeting cards, or paper bags for a sustainable and budget-friendly version.
- Hot Glue Instead of Sewing: Skip the needle and thread by using hot glue to quickly assemble banner pieces and decorations.
- Double-Sided Tape: Ideal for renters or event spaces, this makes your banner easy to hang and remove without damage.
Styling Tips for Different Spaces
- Mantel Display: Hang the banner just under your fireplace mantel and pair with spring candles, faux greenery, or floral garlands.
- Wall or Window Accent: Drape your banner across a blank wall or sunny window for a light, airy pop of color.
- Outdoor Entryway: Add waterproofing spray or use laminated pieces to display your banner on a porch or fence for spring curb appeal.
- Kids’ Room or Classroom: Choose pastel tones and fun shapes like butterflies, bunnies, or flowers to create a spring-friendly environment for young children.
Phrases and Themes to Try
- Hello Spring
- Bloom & Grow
- Spring Has Sprung
- Happy Easter (for holiday-specific décor)
- Welcome Sunshine
With just a few supplies and a spark of creativity, your DIY spring banner can become a standout seasonal piece that reflects your style and brightens your home. Whether you’re crafting solo or making it a fun family project, this homemade decoration is a charming way to welcome the new season.
Hello Amanda, I like your Spring banner. Well done! Have a good weekend, too!
Thank you Jacqui!
So cute and quick! Love it : )
Thank you Sarah! Just checked out your blog! I love your ideas, the reversible apron is adorable!
Love banners, this one is super cute with the spring colors!
Thank you for linking up to Fabric Frenzy Friday!
-Lindsey
Fabric Frenzy Friday
Thank you! And thank you for hosting the link up the link up!
Hey it’s Deonna from the Child at Heart blog. I LOVE this and would love for you to link up at our link party this week! I also have a super great spring necklace to give away so come on over 🙂
https://www.thechildatheartblog.com/2014/04/link-party-with-morganize-with-me.html
Super cute banner! I love all the colors and textures! Thank you for sharing! Pinning!
Cat